Home > Proving Grounds > The Proving Ground
The Proving Ground Guide
This document is the essential Proving Ground (PG) overview and setup guide. It includes the details on what a PG is, who can have one, how to request it, how to onboard it, access it, and manage it.
Overview
The Proving Ground (PG) was created to provide Omnissa's valued partner organizations with a single lasting testing and demonstration environment for Omnissa’s Workspace ONE and Horizon Cloud products.
Available to active partners, employees, and Tech Insiders, a PG is a non-expiring, unrestricted, enterprise SKU’d Workspace ONE and Horizon Cloud environment with a GA codebase. Authorized and provisioned by TestDrive, the PG is identical to a production environment, lives in the Omnissa cloud, and is accessed through Omnissa Connect.
Each PG is provisioned with the following fully functional, full-access products, all hosted in Omnissa’s production cloud:
- Omnissa Intelligence
- Omnissa Workspace ONE UEM withWorkspace ONE Assist
- Omnissa Access Cloud
- Omnissa Workspace ONE Hub Services
- Omnissa Horizon Cloud Service - Next-Gen
- Omnissa Identity Service
Mobile Threat Defense (MTD) is not currently enabled in a PG. If you require MTD, contact your pre-sales representative.
Prerequisites
Eligibility
Only active Omnissa partner employees, Omnissa employees, or Omnissa Tech Insiders are permitted to request a PG.
Knowledge
- Workspace ONE and Horizon Cloud products
- A solid understanding of managing Omnissa Connect organizations.
Omnissa Account
An Omnissa Account is required to own an Omnissa Connect organization. Review your user type below for specifics.
A partner employee must have an Omnissa Account based on the partner organization's email domain (no suffixes). Get an Omnissa Account here.
An Omnissa Account (OA) with your username@omnissa.com email address is separate from your federated corporate account. Get an Omnissa Account here. When logging in to Omnissa Connect, choose SSO as it supersedes your OA for authentication.
Registered Tech Insiders should already have an Omnissa Account. During the login process, your email address will undergo Tech Insider validation. After you're verfied as a TI, you’ll be permitted to access the PG request.
Email Delivery
Your network must deliver email from *.workspaceone.com to your inbox.
Proving Ground Setup
The PG Setup is a one-time procedure authorized by TestDrive. You first request access to a PG in TestDrive, and then onboard the PG in Omnissa Connect. After onboarding is completed, you will access the PG through Omnissa Connect.
Total setup time: < 10 min
PG Request
Warning
Do not make a request without completing PG onboarding.
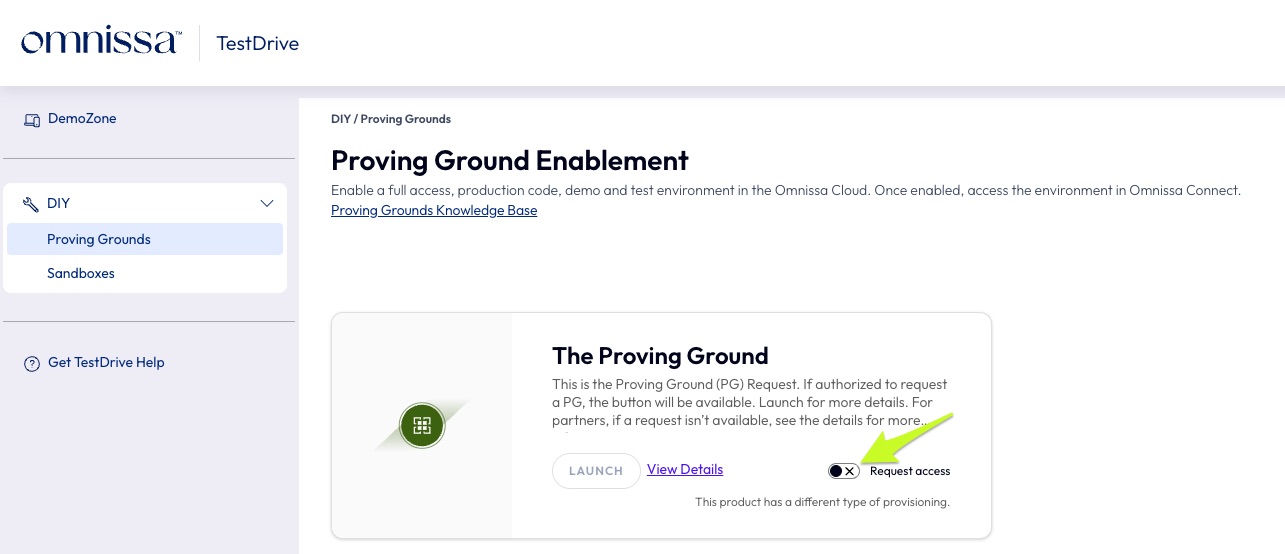
1. Log in to TestDrive and go to DIY → Proving Grounds.
Go to DIY → Proving Grounds. TestDrive authentication is by Omnissa Connect. Use either SSO (all employees and federated partners) or your Omnissa Account.
Review the Proving Ground tile's presented information.
Locate the “request access” toggle on the tile.
Partner Experience
The first partner user to access the activity makes the request and onboards the PG. Subsequent users can contact the owner when requesting access. This is by design.
Click the switch to make the PG request.
2. Review the Proving Ground Disclaimer.
CAREFULLY READ THE PRESENTED PROVING GROUND DISCLAIMER AS IT CONTAINS CRITICAL INFORMATION REGARDING SERVICE SUPPORT AND PROPER PG USAGE. YOUR ACCEPTANCE OF THE DISCLAIMER'S CONDITIONS IS REQUIRED TO PROCEED.
PG Onboarding
Warning
In the following steps, you are setting up a new Omnisssa Connect organization that contains the PG's services. Carefully, follow each step.
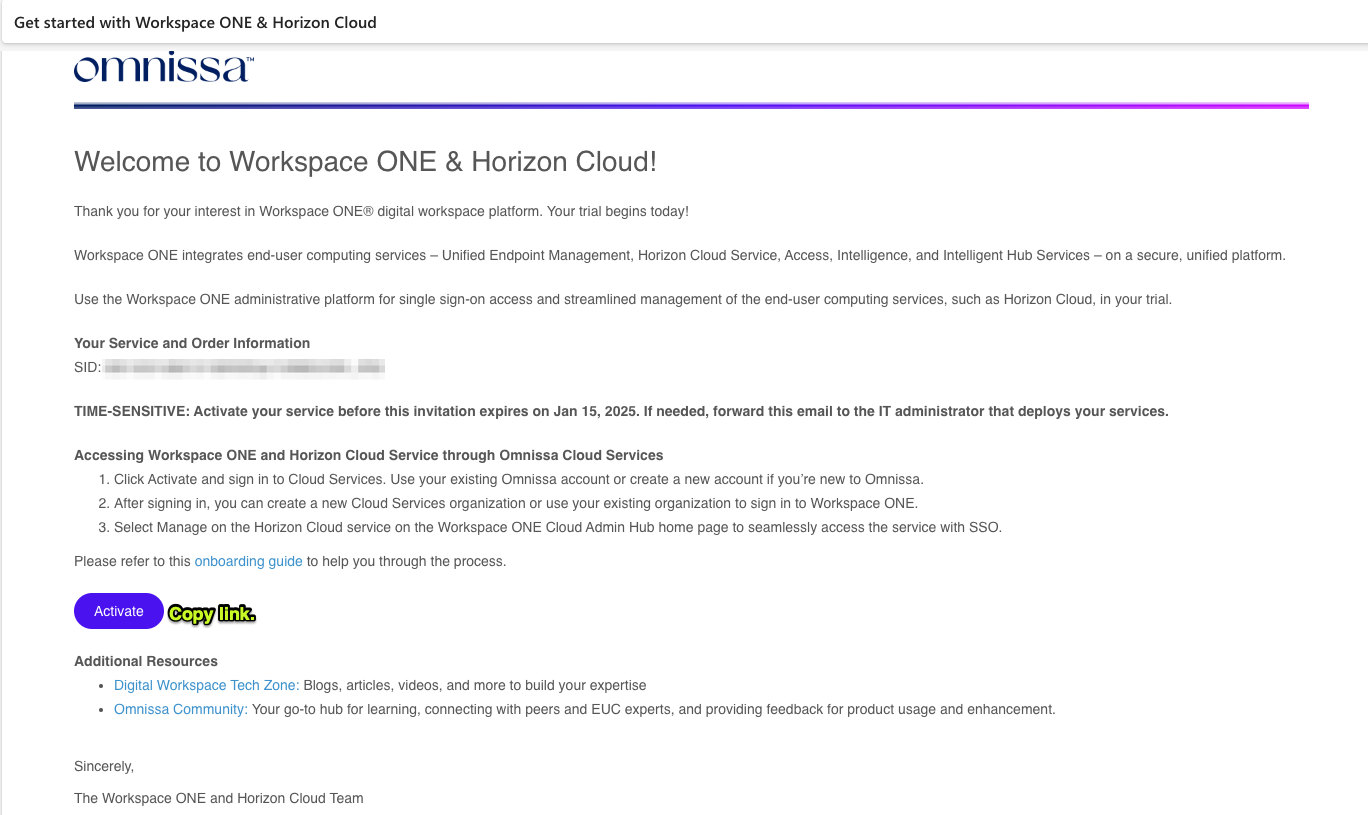
3. Locate the ‘Get Started’ invitation email and copy the "Activate" or "Get Started" link.
After making the request, in a few moments, you will receive a "Get Started with Workspace ONE" invitation email from the Workspace ONE Team.
Copy the "Activate" or "Get Started" link.
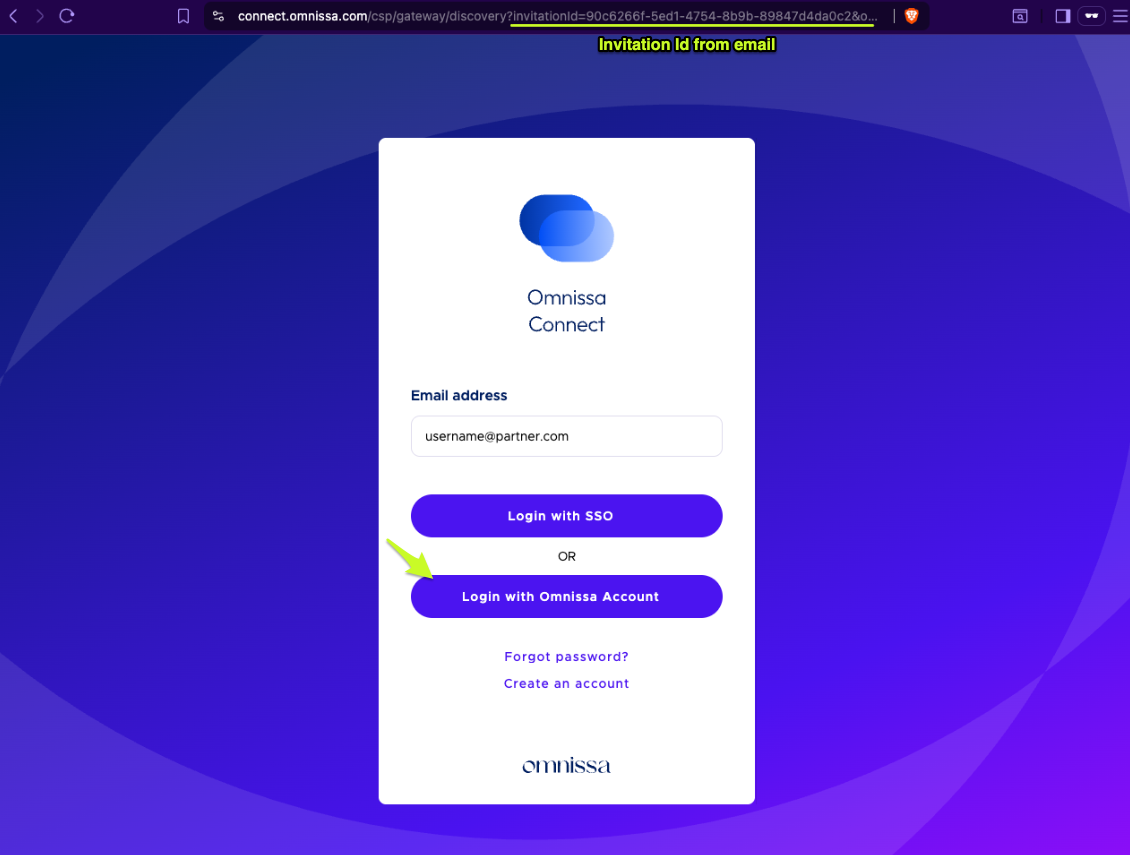
4. Log in to Omnissa Connect using the invitation link.
Warning
Use a private/incognito browser to avoid interference from other IDs, such as those stored in password managers and cookies.
Launch the invitation URL and use your Omnissa Account to log in to Omnissa Connect.
5. Create a new Omnissa Connect organization.
Create a new Omnissa Connect organization.
✅ Select ‘New organization’.
❌ Do NOT add to Existing organization.
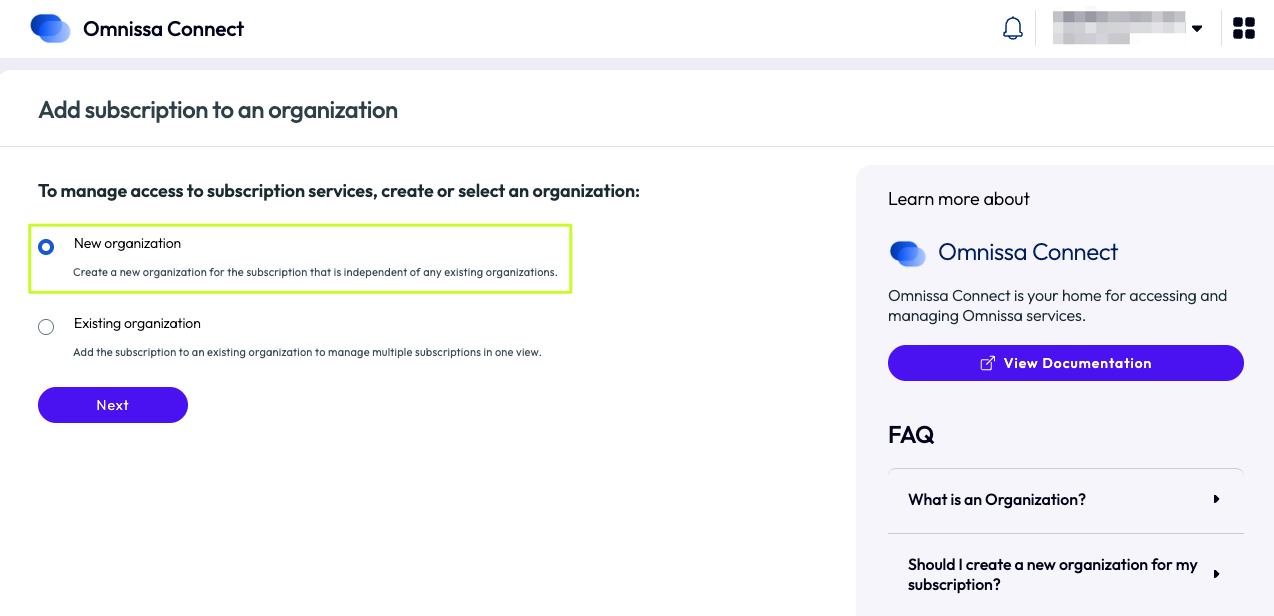
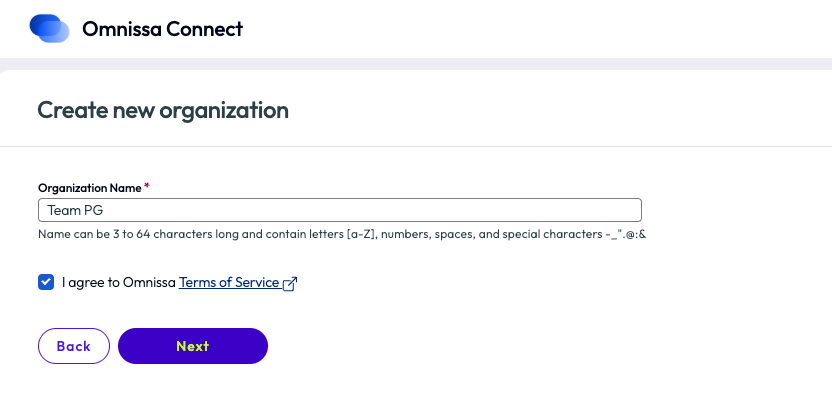
Next, give the organization a unique friendly name...agree to the Omnissa Terms of Service...and save.
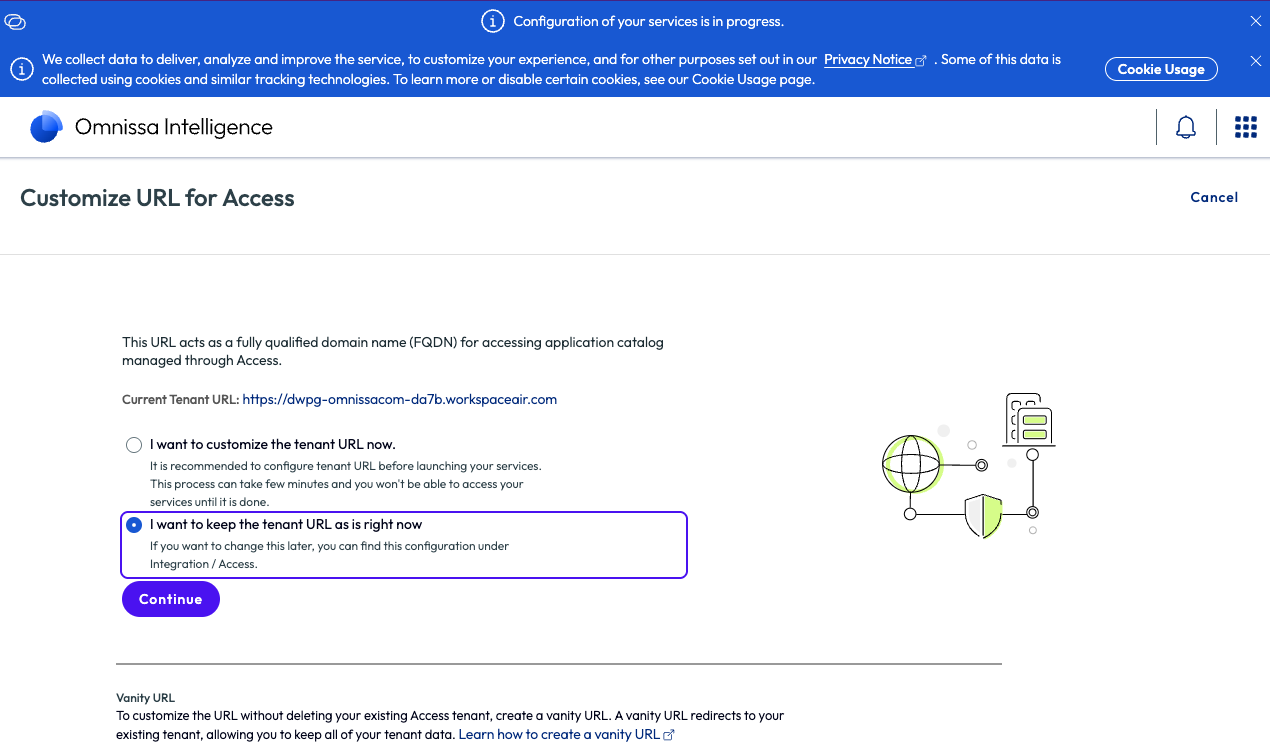
6. Leave the Workspace ONE Access URL as is...or customize it.
Before you customize the Access tenant URL READ THIS.
7. Accept prompts to complete the setup.
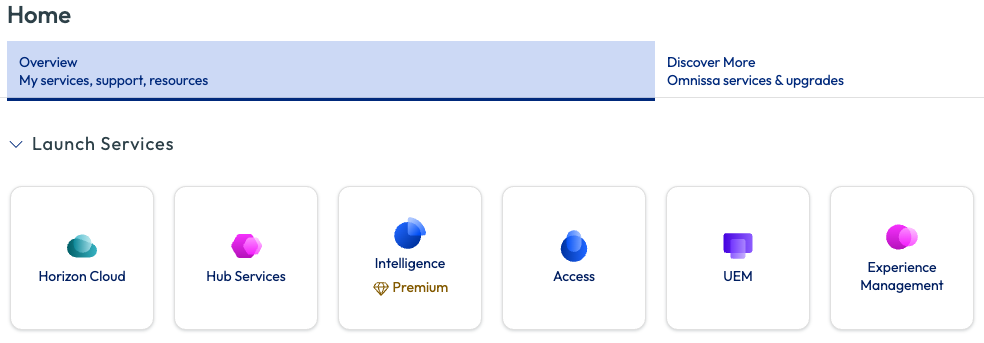
You should land in Omnissa Connect at the PG organization level. Pay attention to the notification bars at the top of the window as they may be relevant to your immediate experience.
Info
By default, the Mobile Threat Defense (MTD) tile is present, however the MTD service is not currently available to a PG. If you require MTD, a tenant can be enabled through the MTD team. Contact your MTD pre-sales representative for more information.
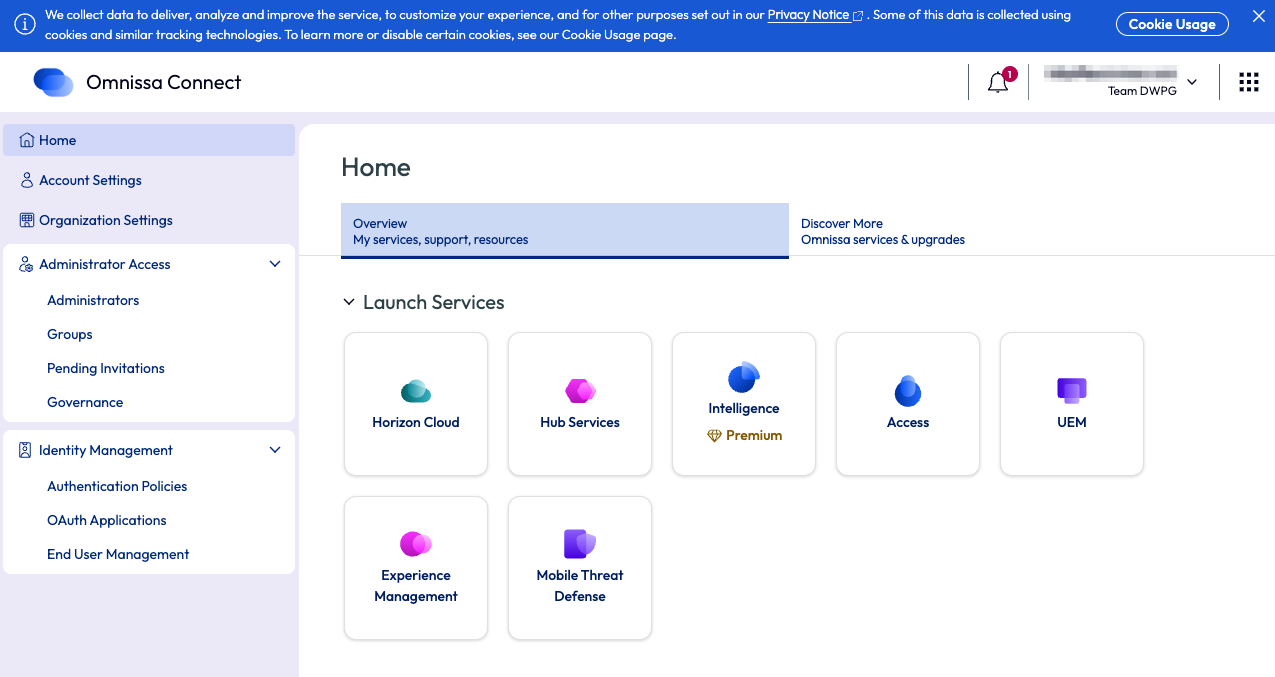
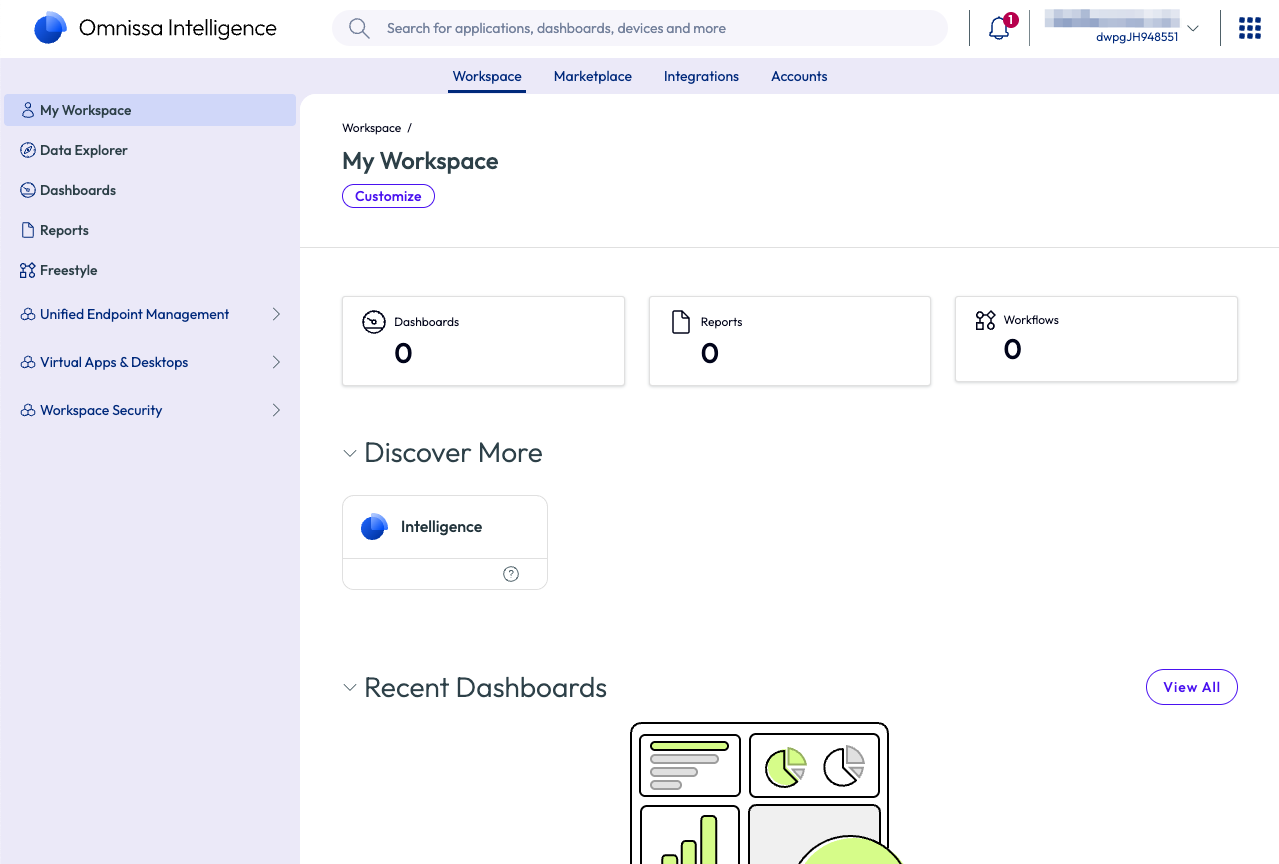
Under Launch Services, each service is accessed. Clicking the tile will SSO your account into the service.
To validate the SSO, for example, click the Intelligence tile to access the Intelligence tenant.
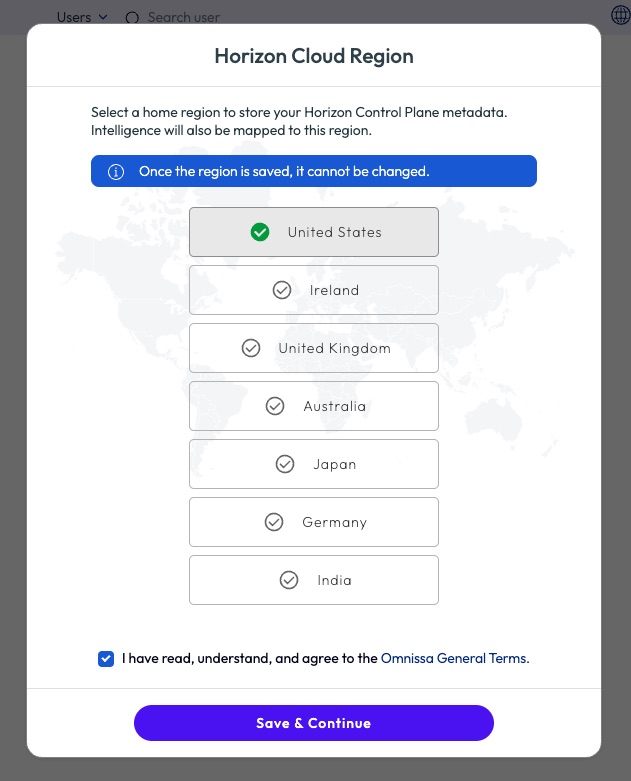
8. Onboard Horizon Cloud Service.
Horizon Cloud Service provisioning may take a few extra moments. Check the notification banners for status.
When Horizon Cloud is ready, upon first launch of Horizon Cloud, choose your region and agree to the Terms.
9. Add additional owners to your Omnissa Connect PG organization.
Managing Omnissa Connect Owners
Managing Omnissa Connect organization owners is a practice rather than a step. To maintain proper and desired access to the PG, reference Managing Your Omnissa Connect Organizations.
The user who makes the PG request is the owner—the sole owner—of the Omnissa Connect organization. Here you can add trusted coworkers as owners to your PG organization, either to share ownership responsibilities or as a backup owner to prevent losing PG access altogether. Again, reference Managing Your Omnissa Connect Organizations.
- Go to the Omnissa Connect organizational level. You should see Omnissa Connect in the upper left.
- In the left-hand menu, go to Administrator Access > Administrators.
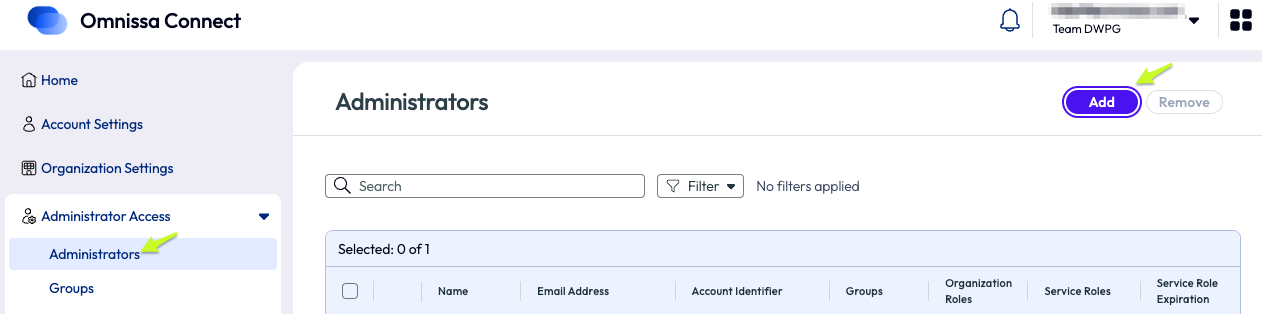
- Click Add. Enter the desired owner's email(s).
- Assign organizational role: Owner
- Click lower right Add.
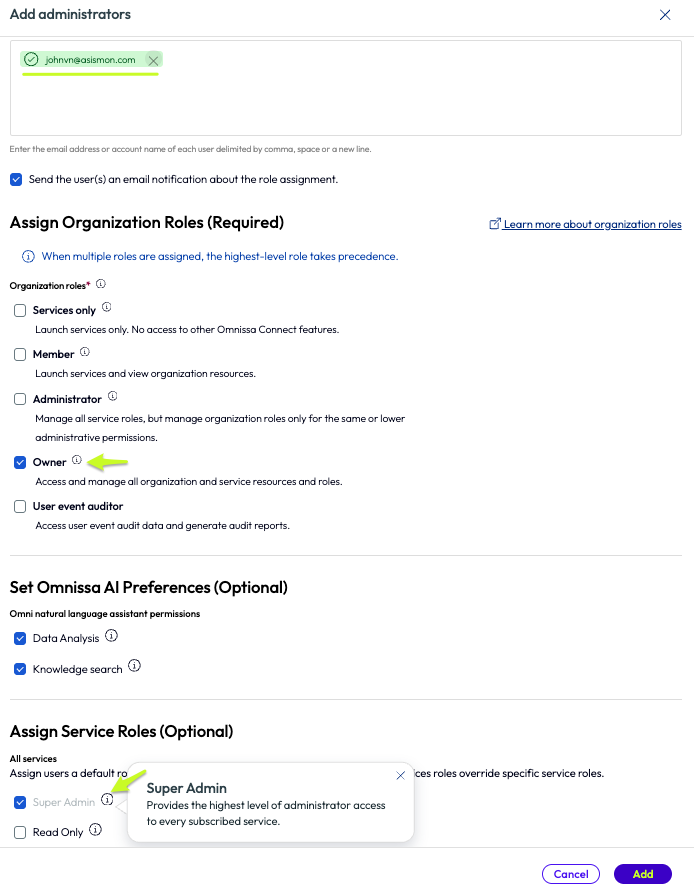
Note
When adding the organization "Owner" role, "Super Admin" is automatically selected for all downstream services. You do not need to set individual service roles when adding an owner.
The newly invited owners will receive an email to join the organization.
The PG setup is complete!
Success After Onboarding
A Proving Ground consists of production services that operate within production environments and data centers. Each Omnissa service is managed and supported by its dedicated product support team. TestDrive acts as the broker for the Omnissa cloud environment and provides support for setup requests.
- Partners should contact their Omnissa representative to facilitate technical product support. Otherwise, the services are self-supported, as stated in the Proving Ground Disclaimer.
- Omnissa employees should follow official internal product support channels. Begin here. Reach out to your lead if you need assistance.
A PG is intended to be a lasting demo environment. Therefore, environment resets are not generally supported. Again, since a PG is comprised of production services running GA code, if you think you've encountered an issue, be sure to contact the appropriate Omnissa product team for proper triage.
Partner PG owners manage all other owners, service super admins, and all members in their organization. As noted throughout the PG guide, an understanding of Managing Your Omnissa Connect Organizations will prevent common user access issues and save time. Always refer to Omnissa product documentation in docs.omnissa.com.
Mobile Threat Defense (MTD) is not available by default in a PG. However, MTD can be requested from MTD product management. If you require the MTD service in a PG, reach out to your MTD pre-sales or product management contact for details on obtaining an MTD tenant.
Workspace ONE Assist is integrated into UEM. Assist is NOT launched from the Omnissa Connect tile. To use Assist, reference Assist product documentation.
