Home > Demo Guides > Dynamic Environment Manager
Omnissa Dynamic Environment Manager Walkthrough
In this quick walkthrough we're going to demo Omnissa Dynamic Environment Manager.
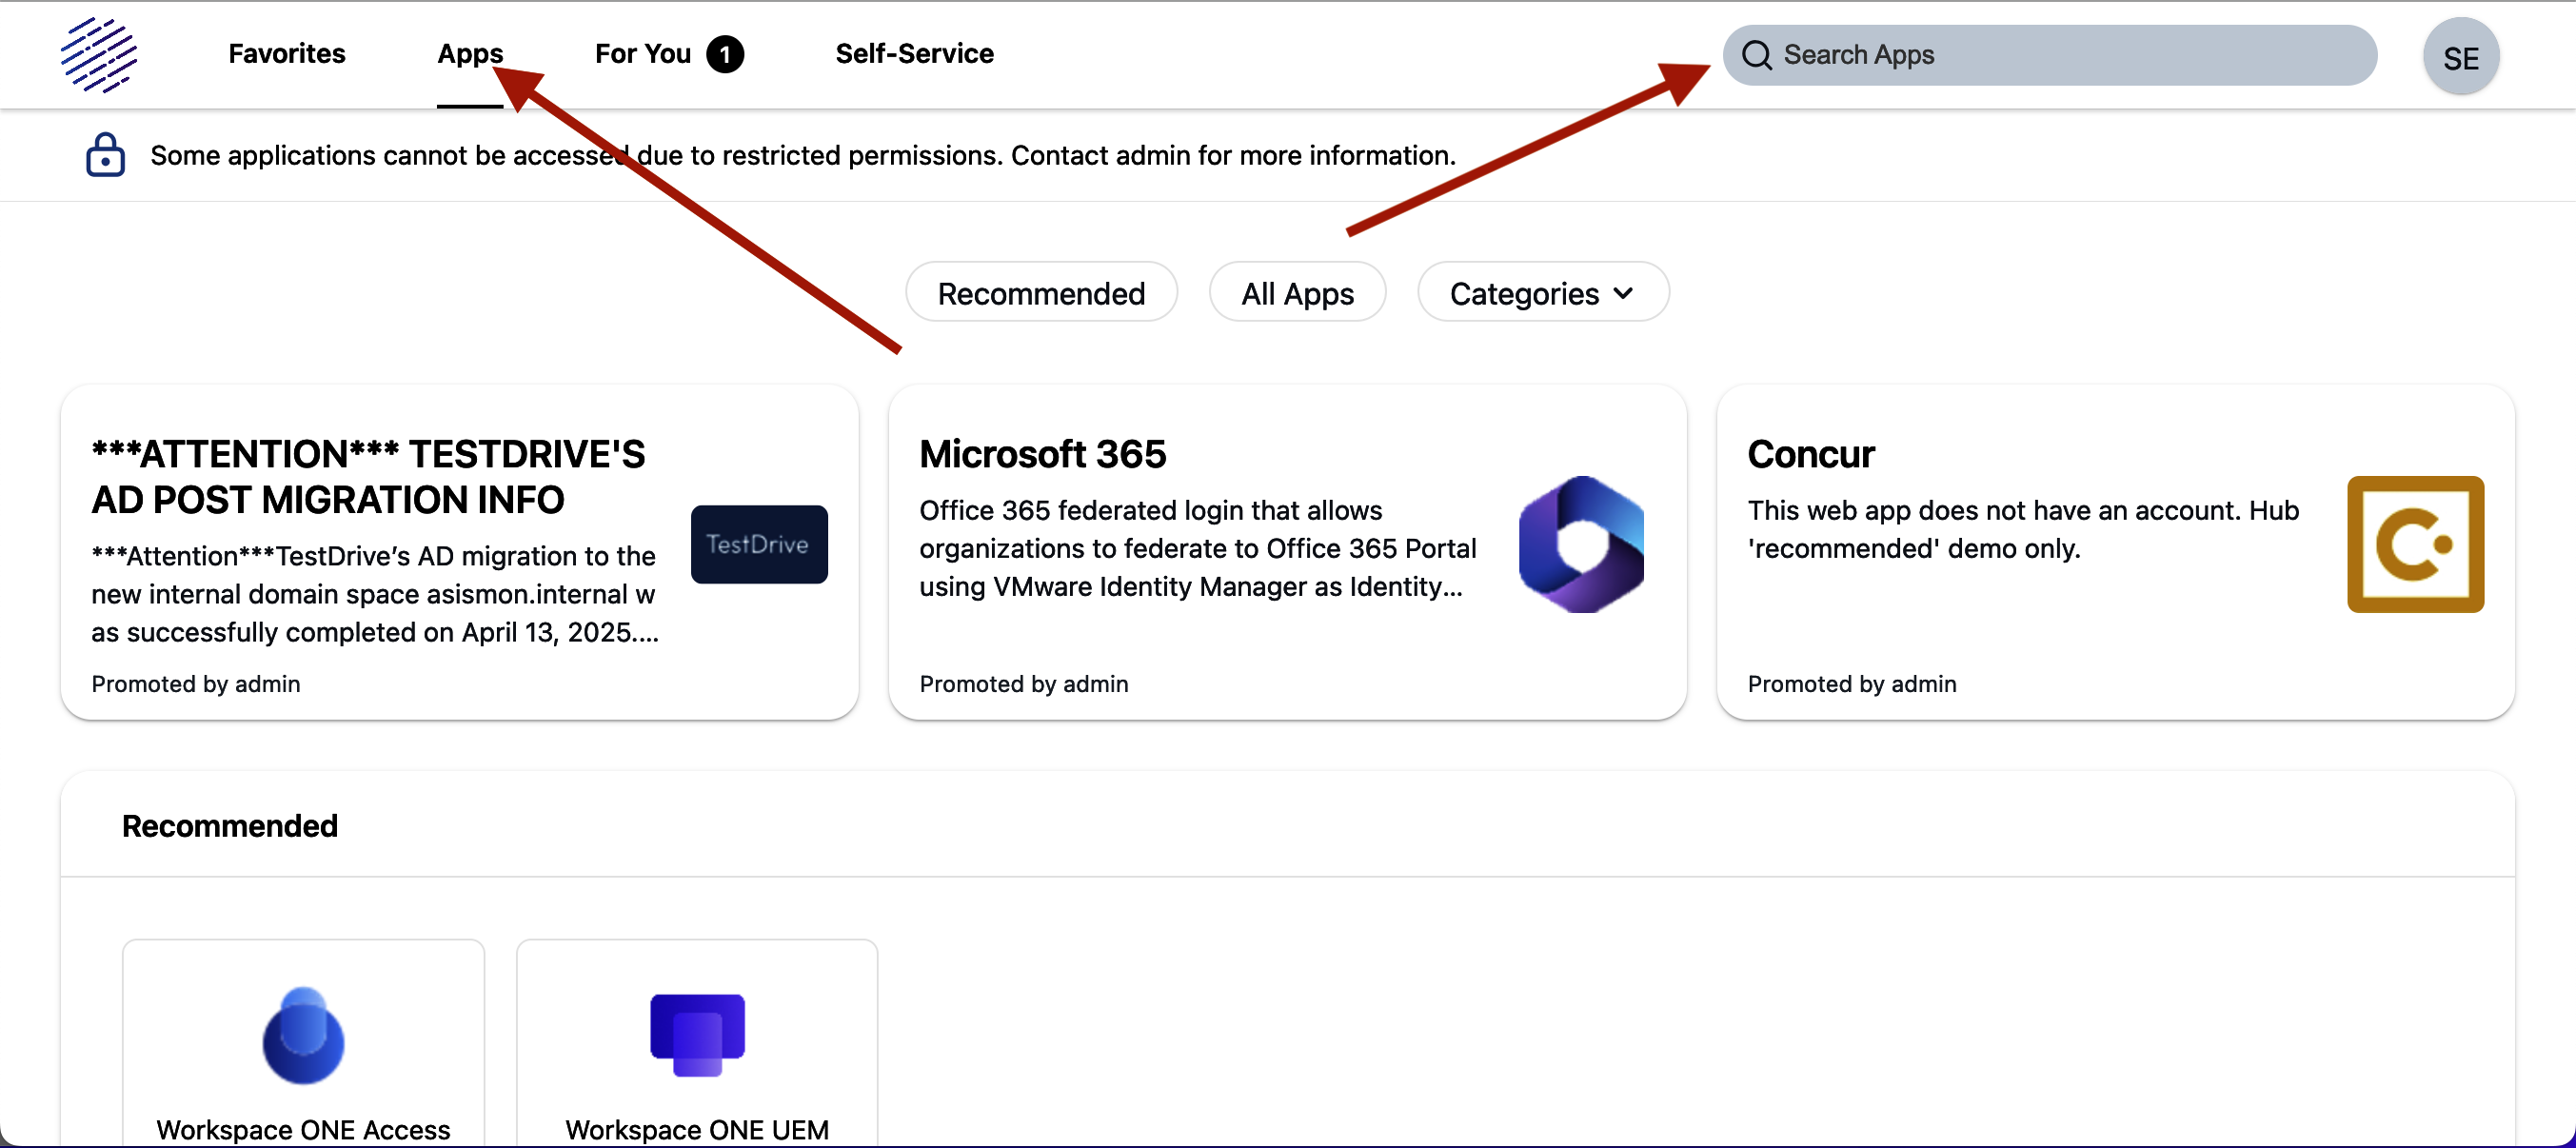
Overview
- Connect to Workspace One Access
- Launch the Dynamic Environment Manager Console to show a managed application configuration for "Paint.net"
- Launch the TD-RDS-Desktops
- Show the application specific network drive and printer mappings associated with "Paint.net"
- From the RDS Desktop launch the Paint.net application and demonstrate the drive and printer mappings in effect, then change some app settings before closing the app
- Launch the "RDS-Paint.net" Horizon published application from Workspace ONE and show the application specific settings we changed have been saved and persist across sessions
Before You Begin
In order to perform the full end-to-end demo make sure you have the following:
- A valid account in the Omnissa TestDrive environment, sign up here if you don't
- Network access from your device and TCP ports 80, 443 and 4172 & UDP 4172 enabled
- An appropriate Horizon client installed on your device
- An appropriate web browser (such as Google Chrome) installed on your device
Let's get started, open up your favorite web browser and get signed into Workspace ONE
https://testdrive.us0.wss.workspaceone.com/
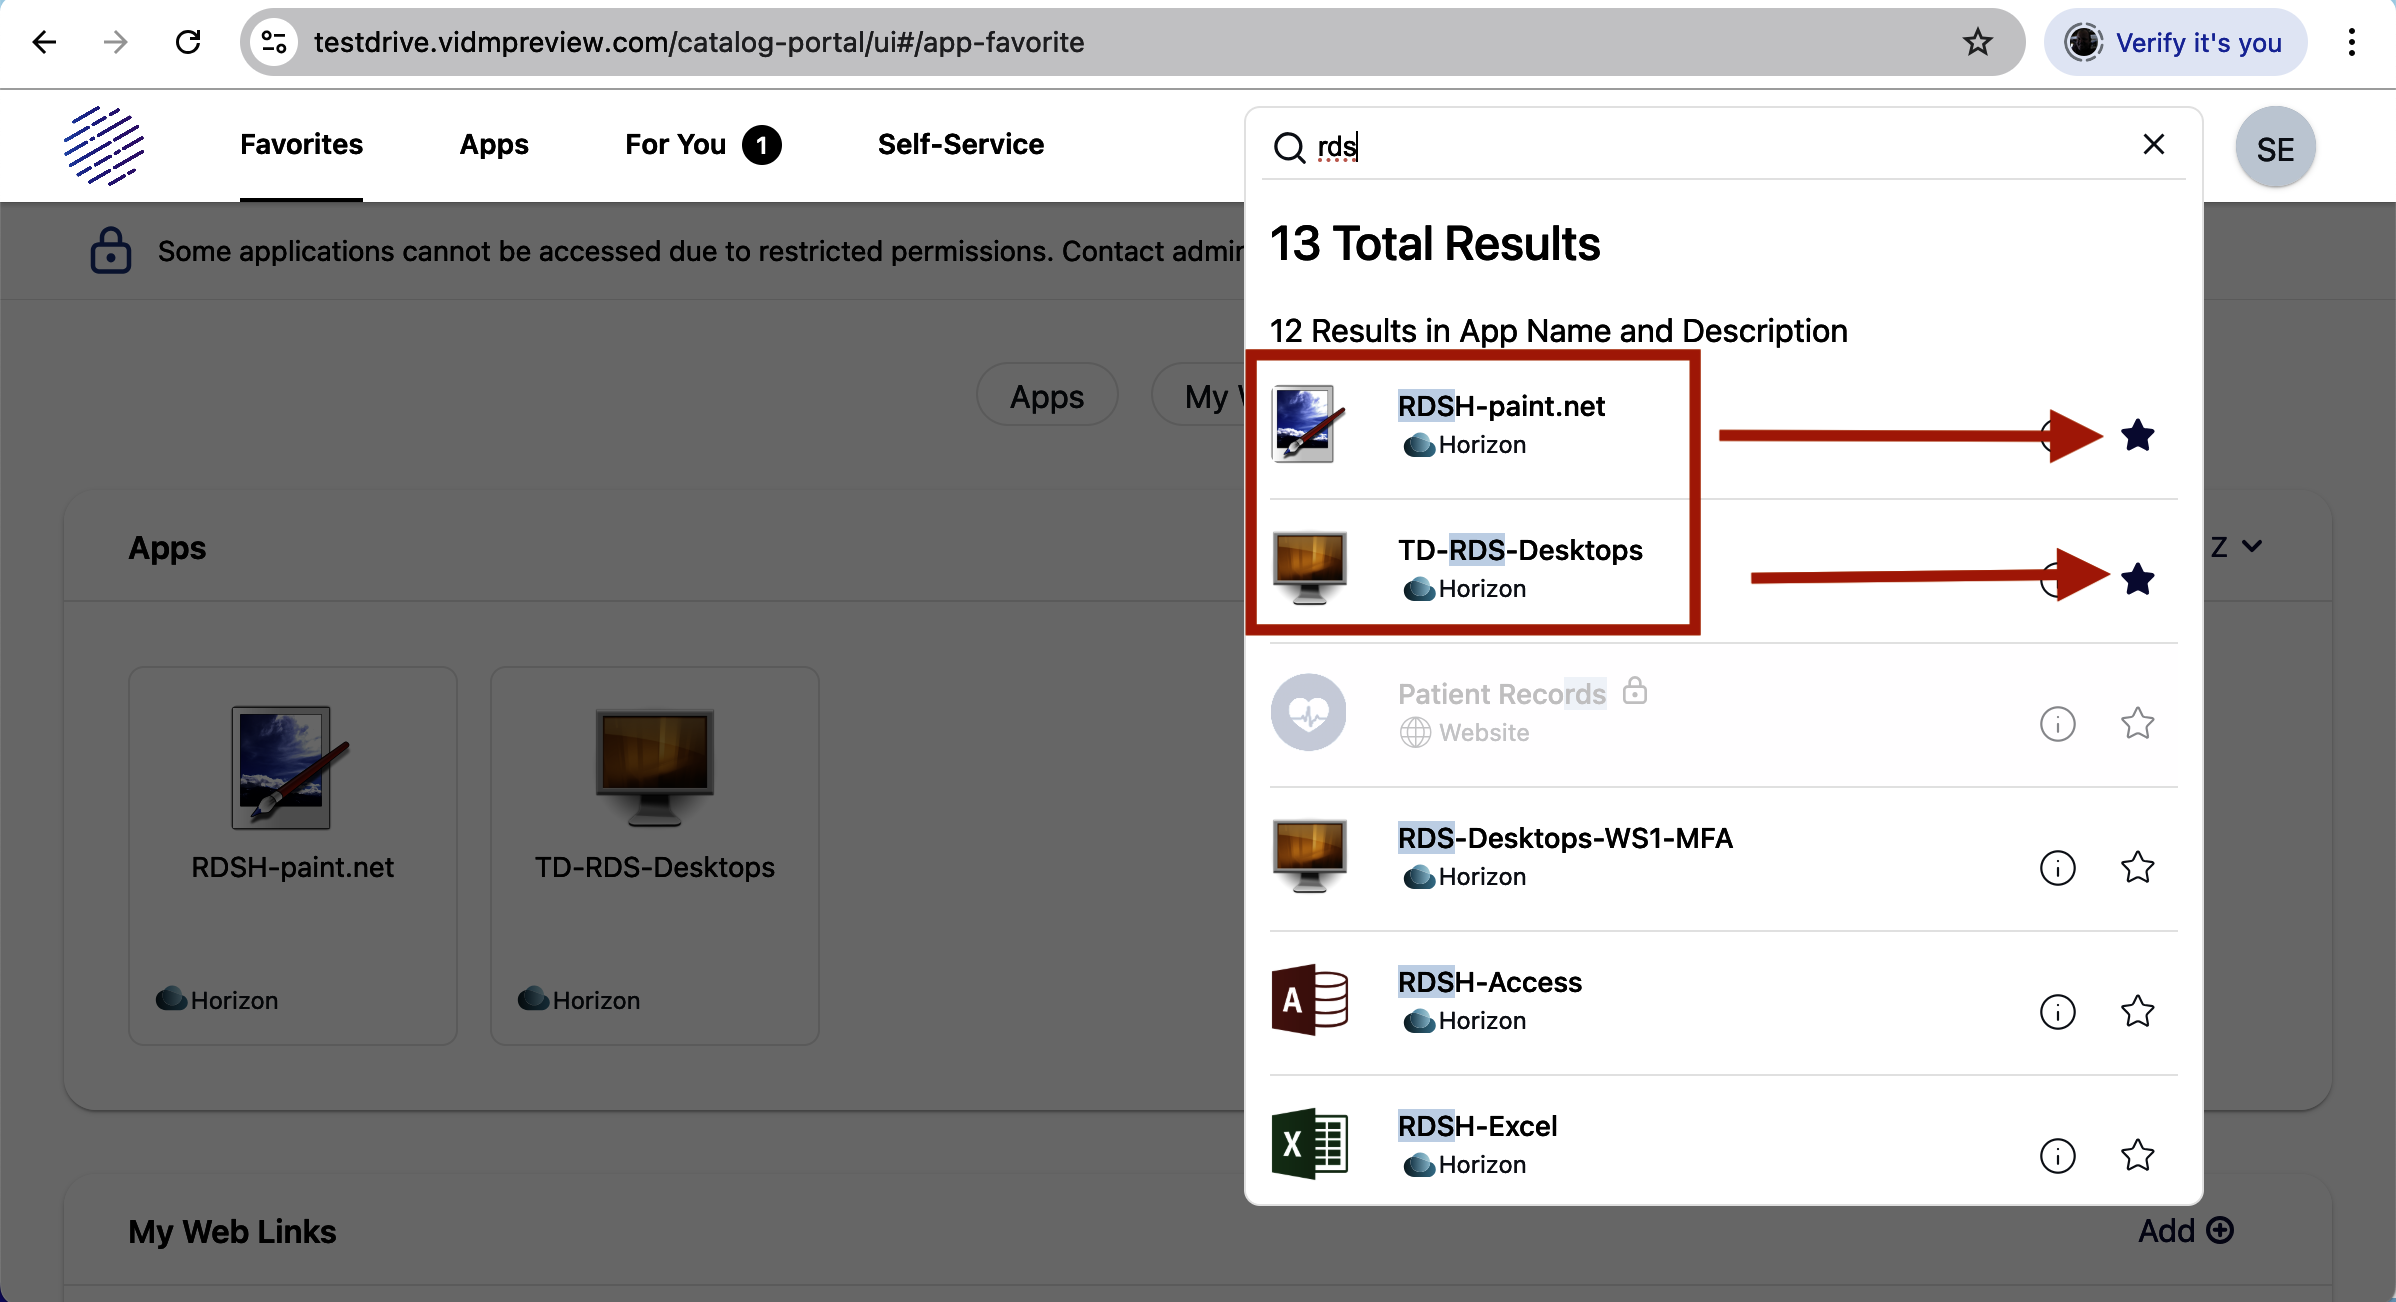
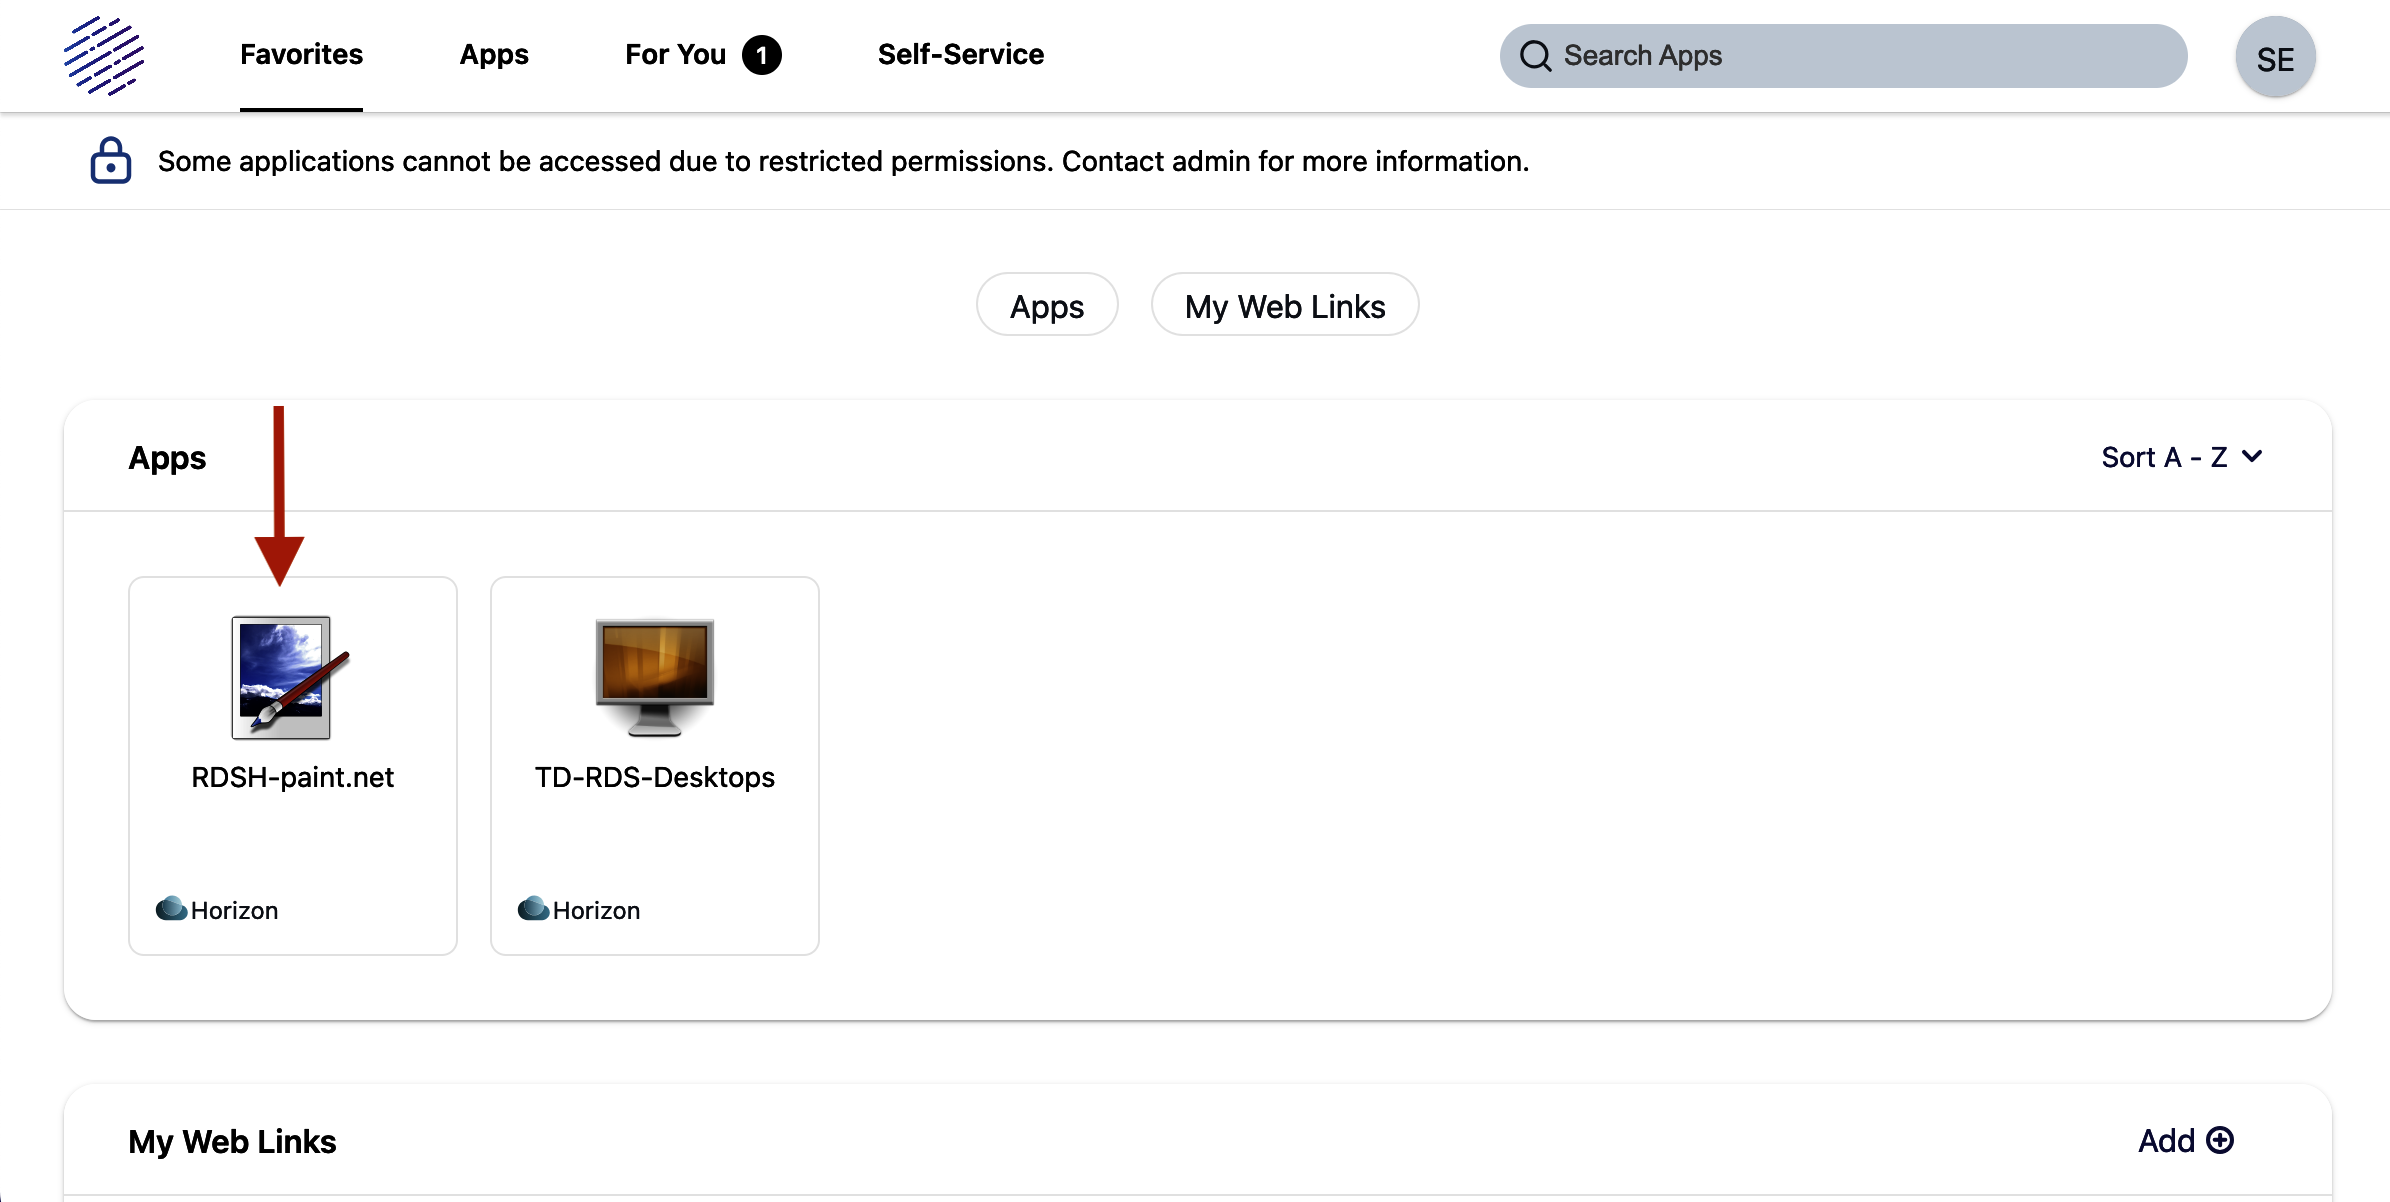
Once you're logged in and at the Workspace ONE home screen, we need to add TD-RDS-Desktops and RDS-Paint.NET to our favorites (If you've already got these, skip ahead to where we first launch the RDS Desktop session from Workspace ONE).
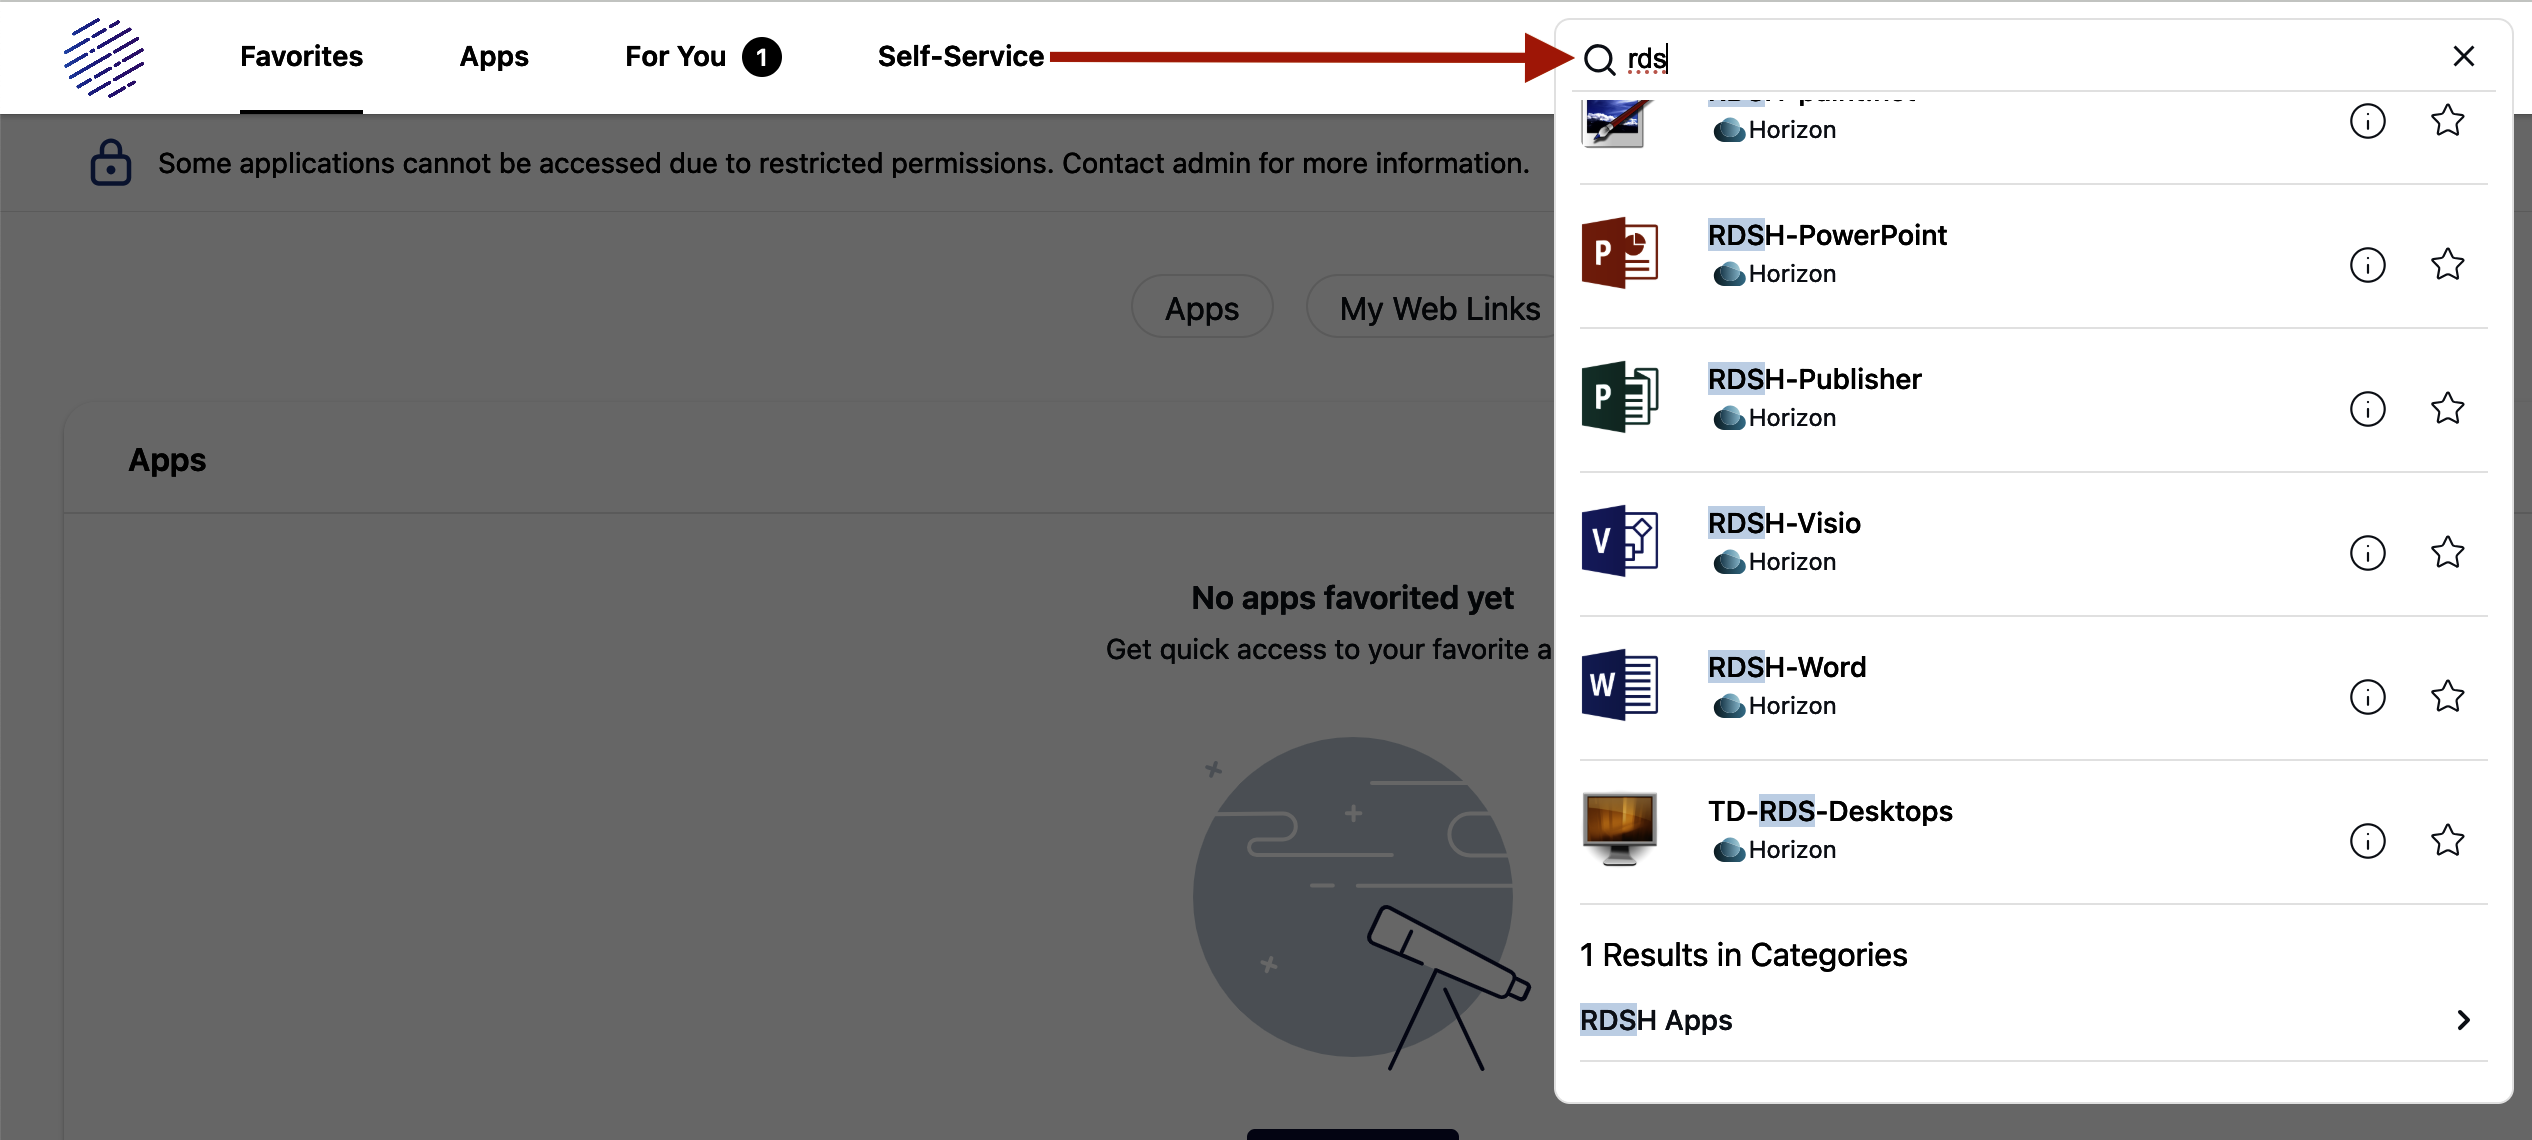
In the search window in the upper right, search using "RDS" and select RDS-Paint.net and TD-RDS-Desktops and click on the star next to each of them to add them to your favorites so they show on the favorites tab in Workspace ONE.
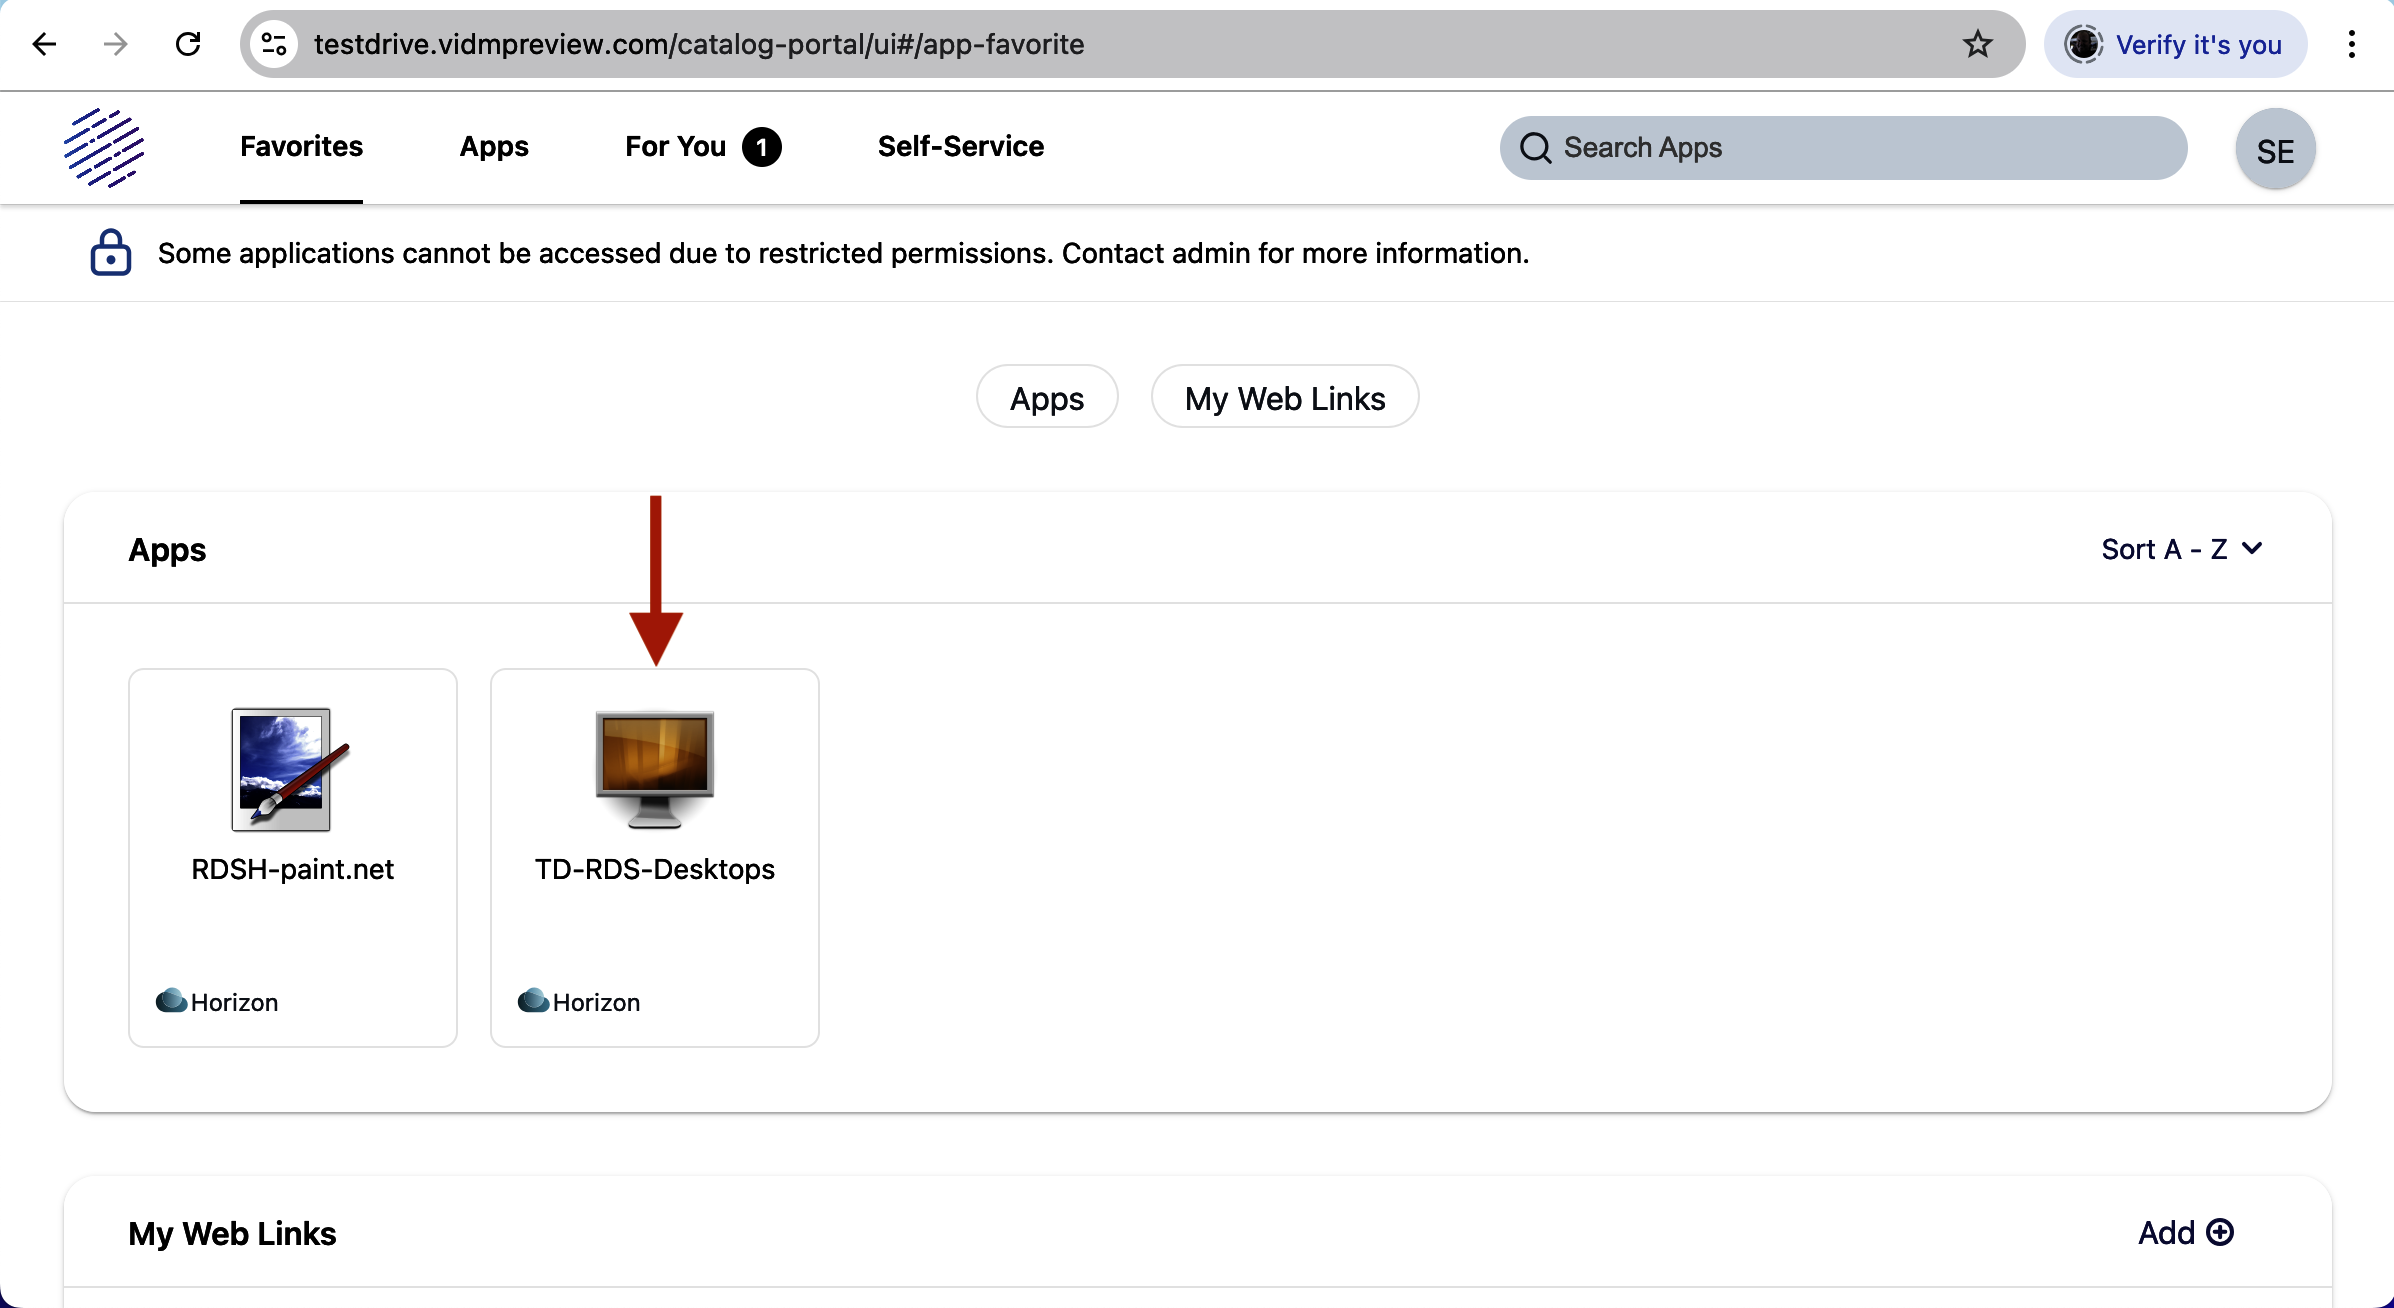
You should now see the new icons in your Bookmarks. Select TD-RDS-Desktops.
Once logged in launch the DEM Management console by double-clicking the "Dynamic Environment Manager Console" icon.
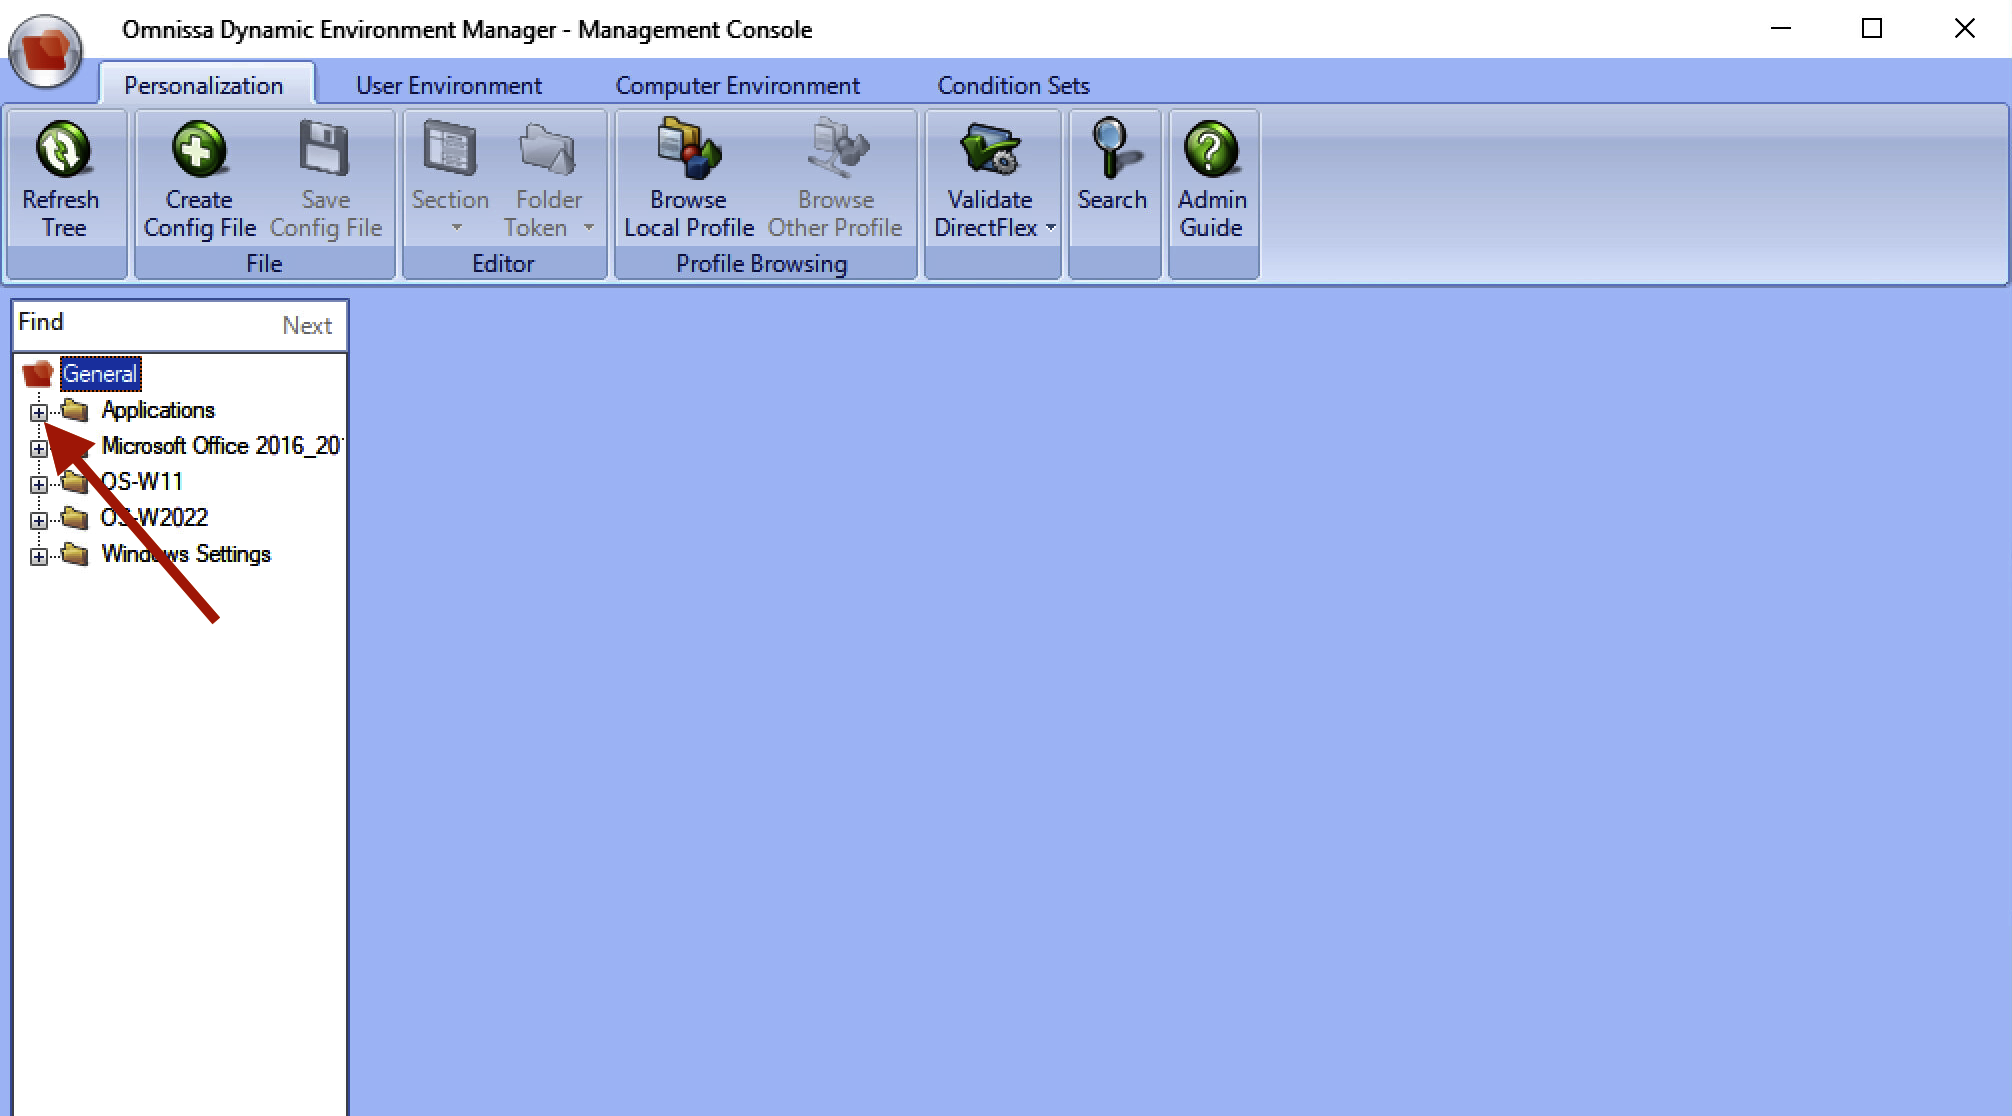
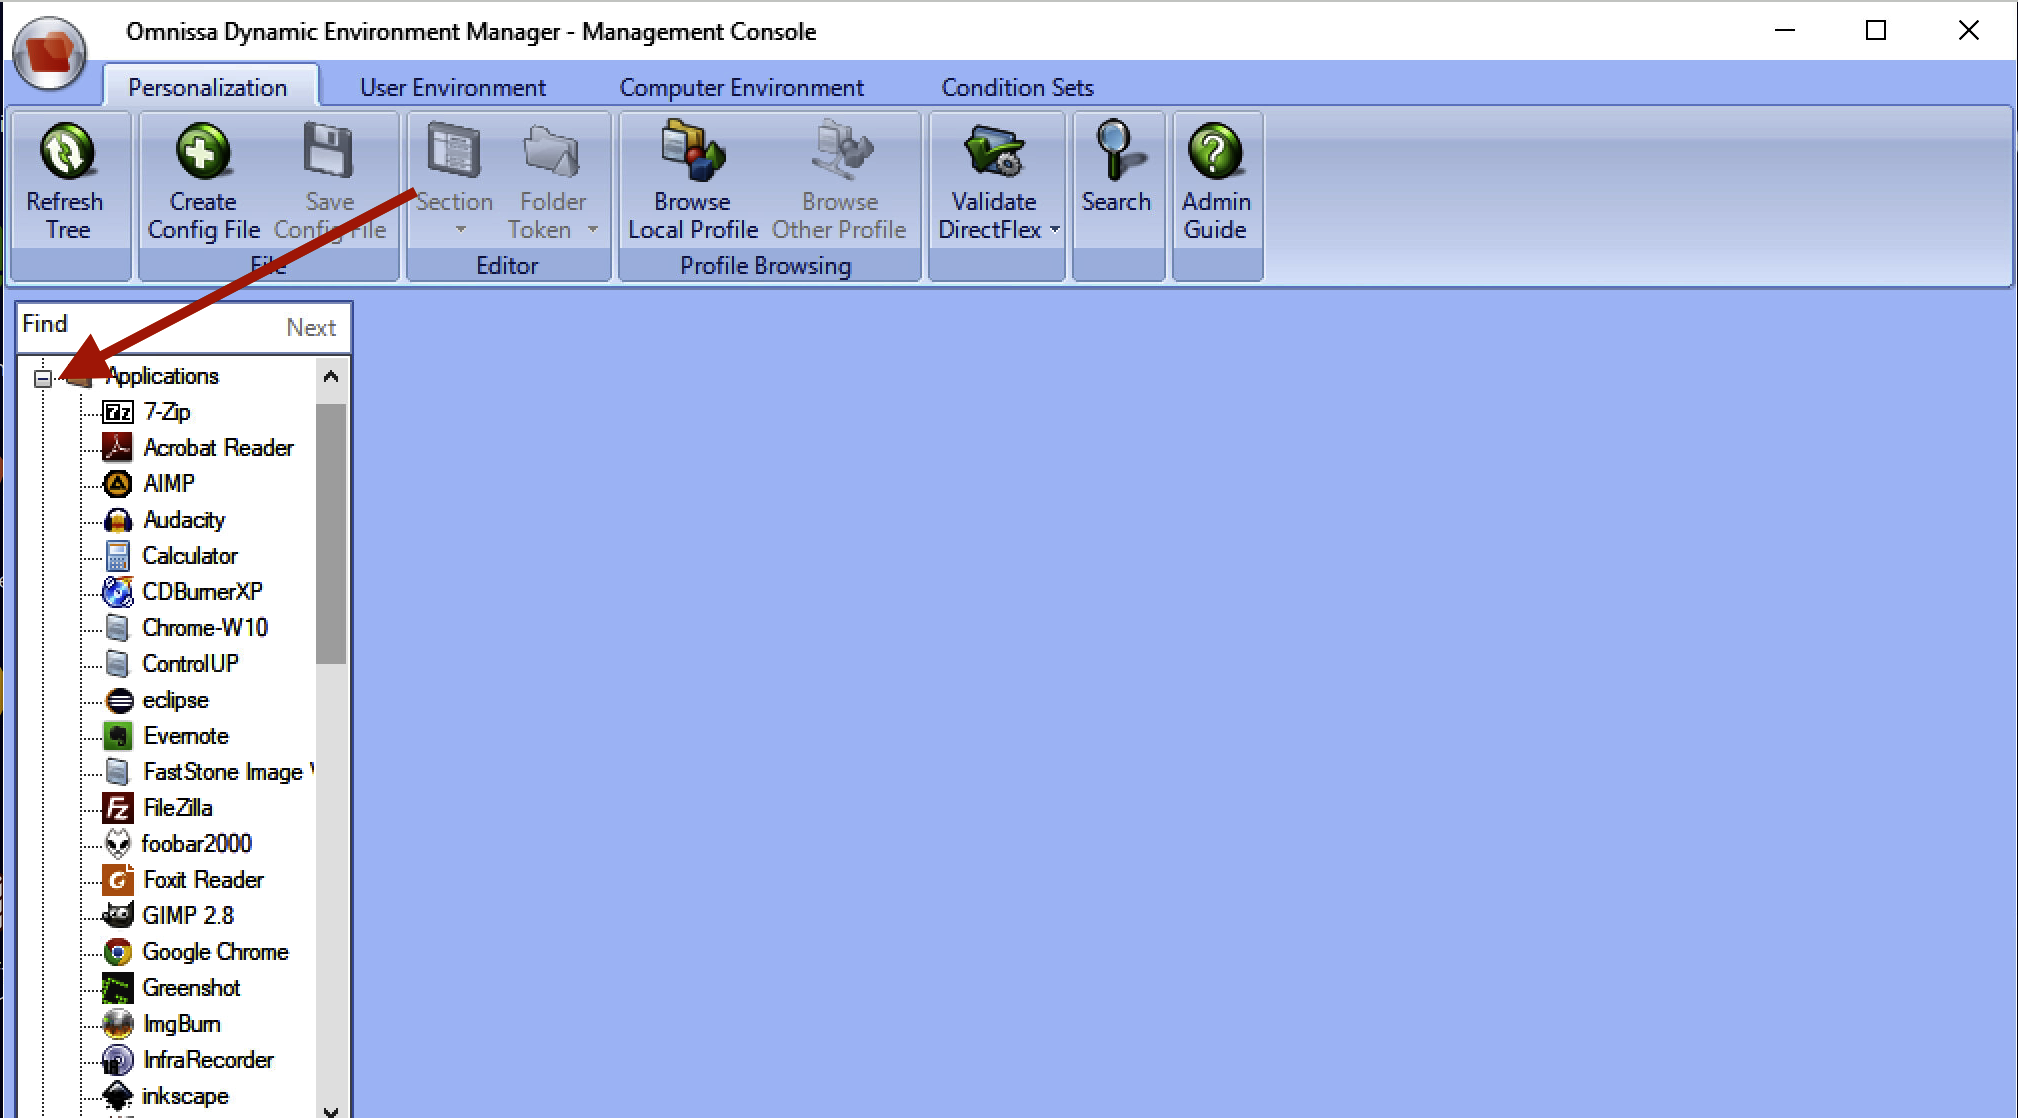
Once the console has launched, click "Applications" then in the "Paint.NET" application
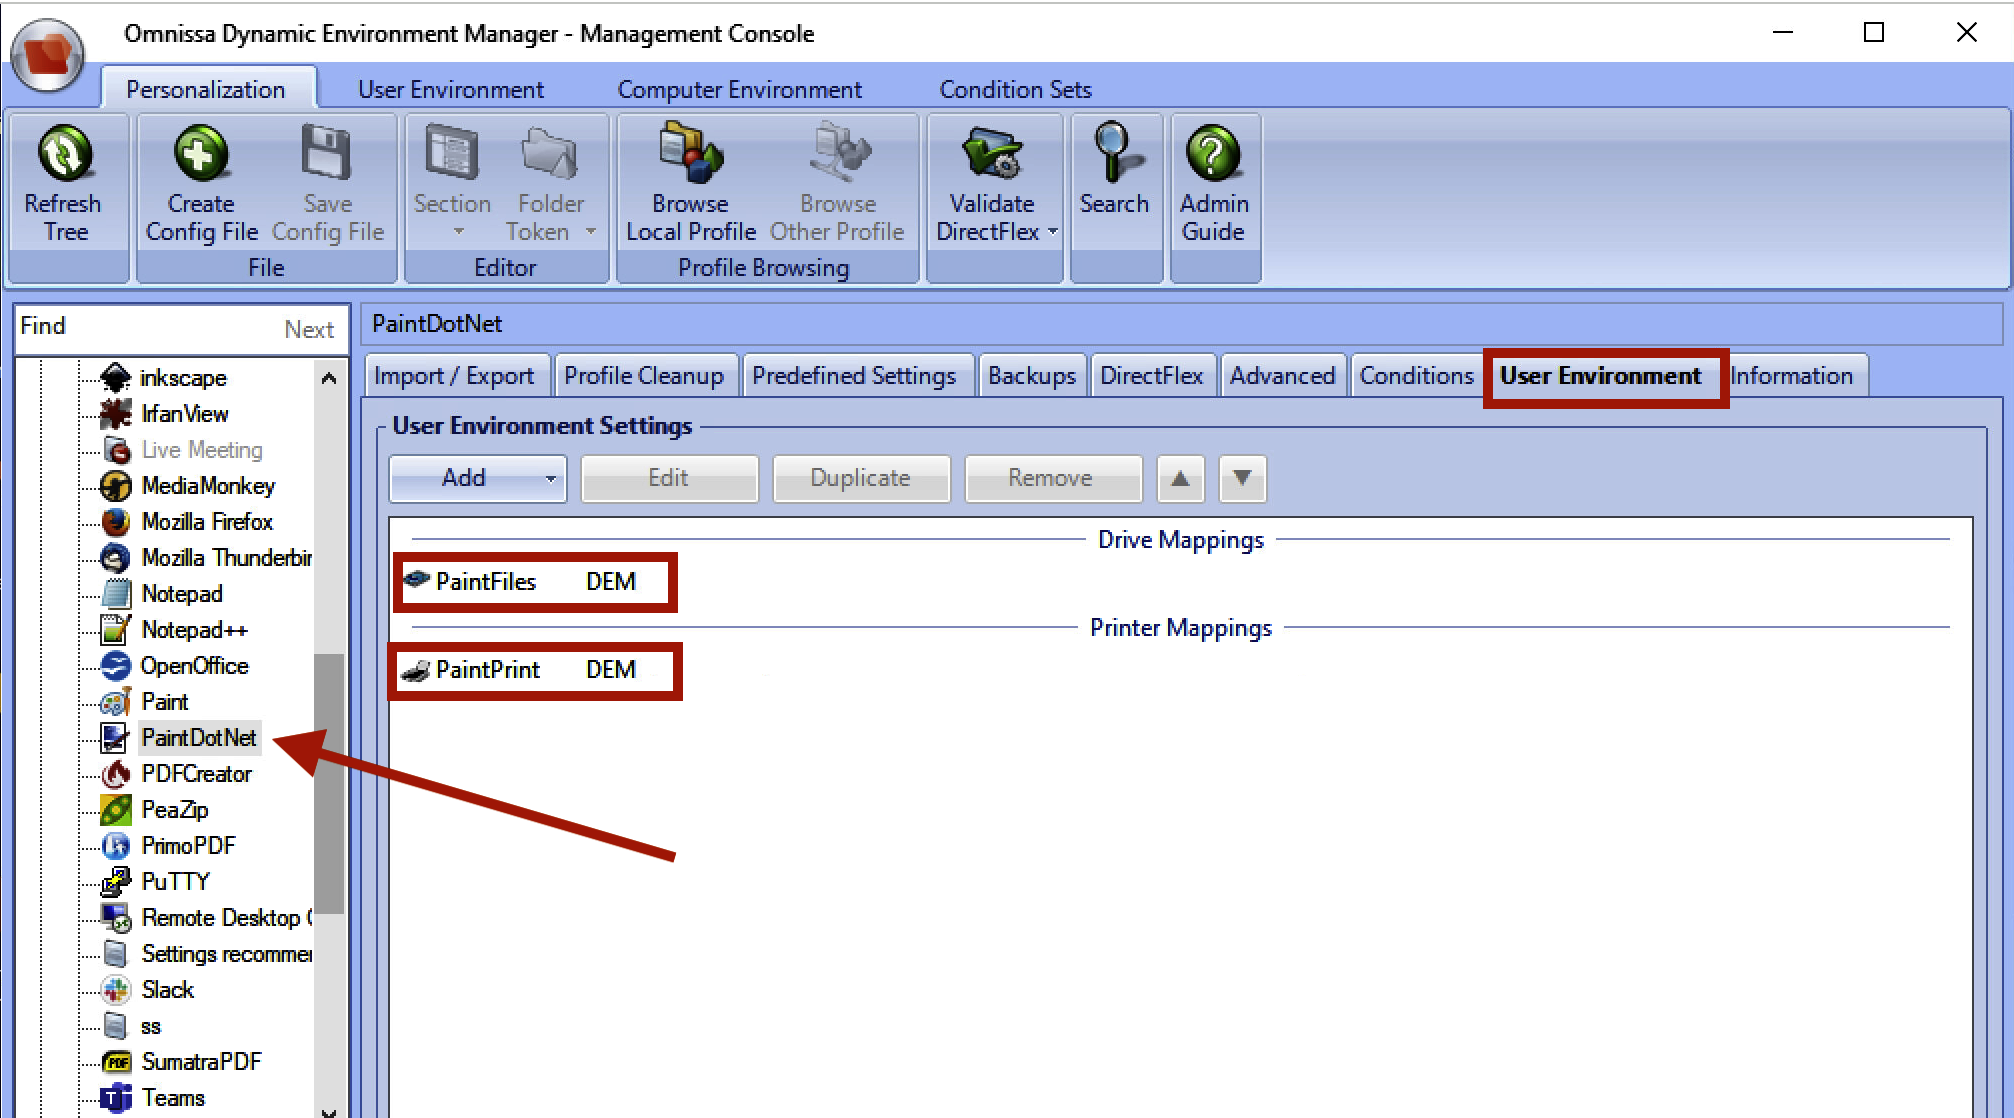
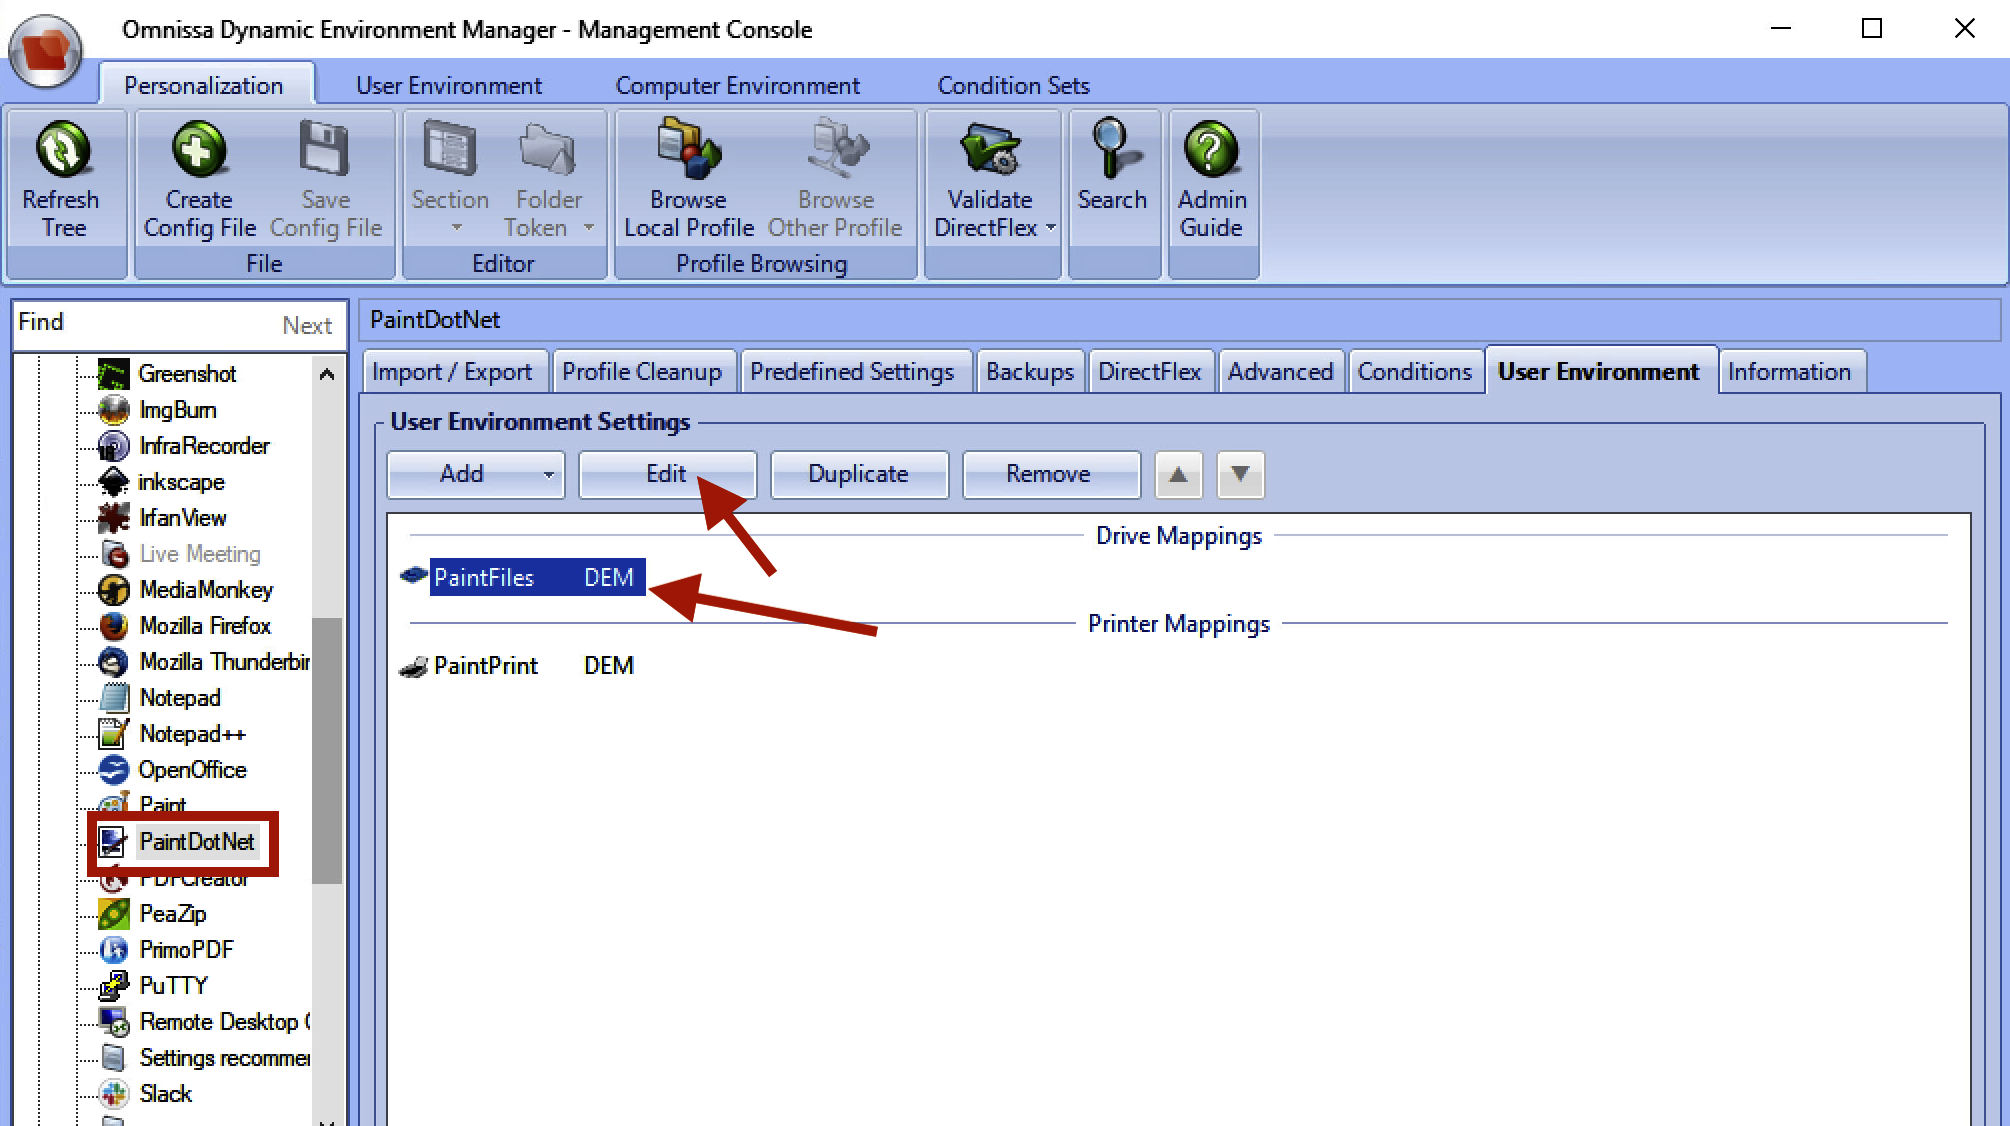
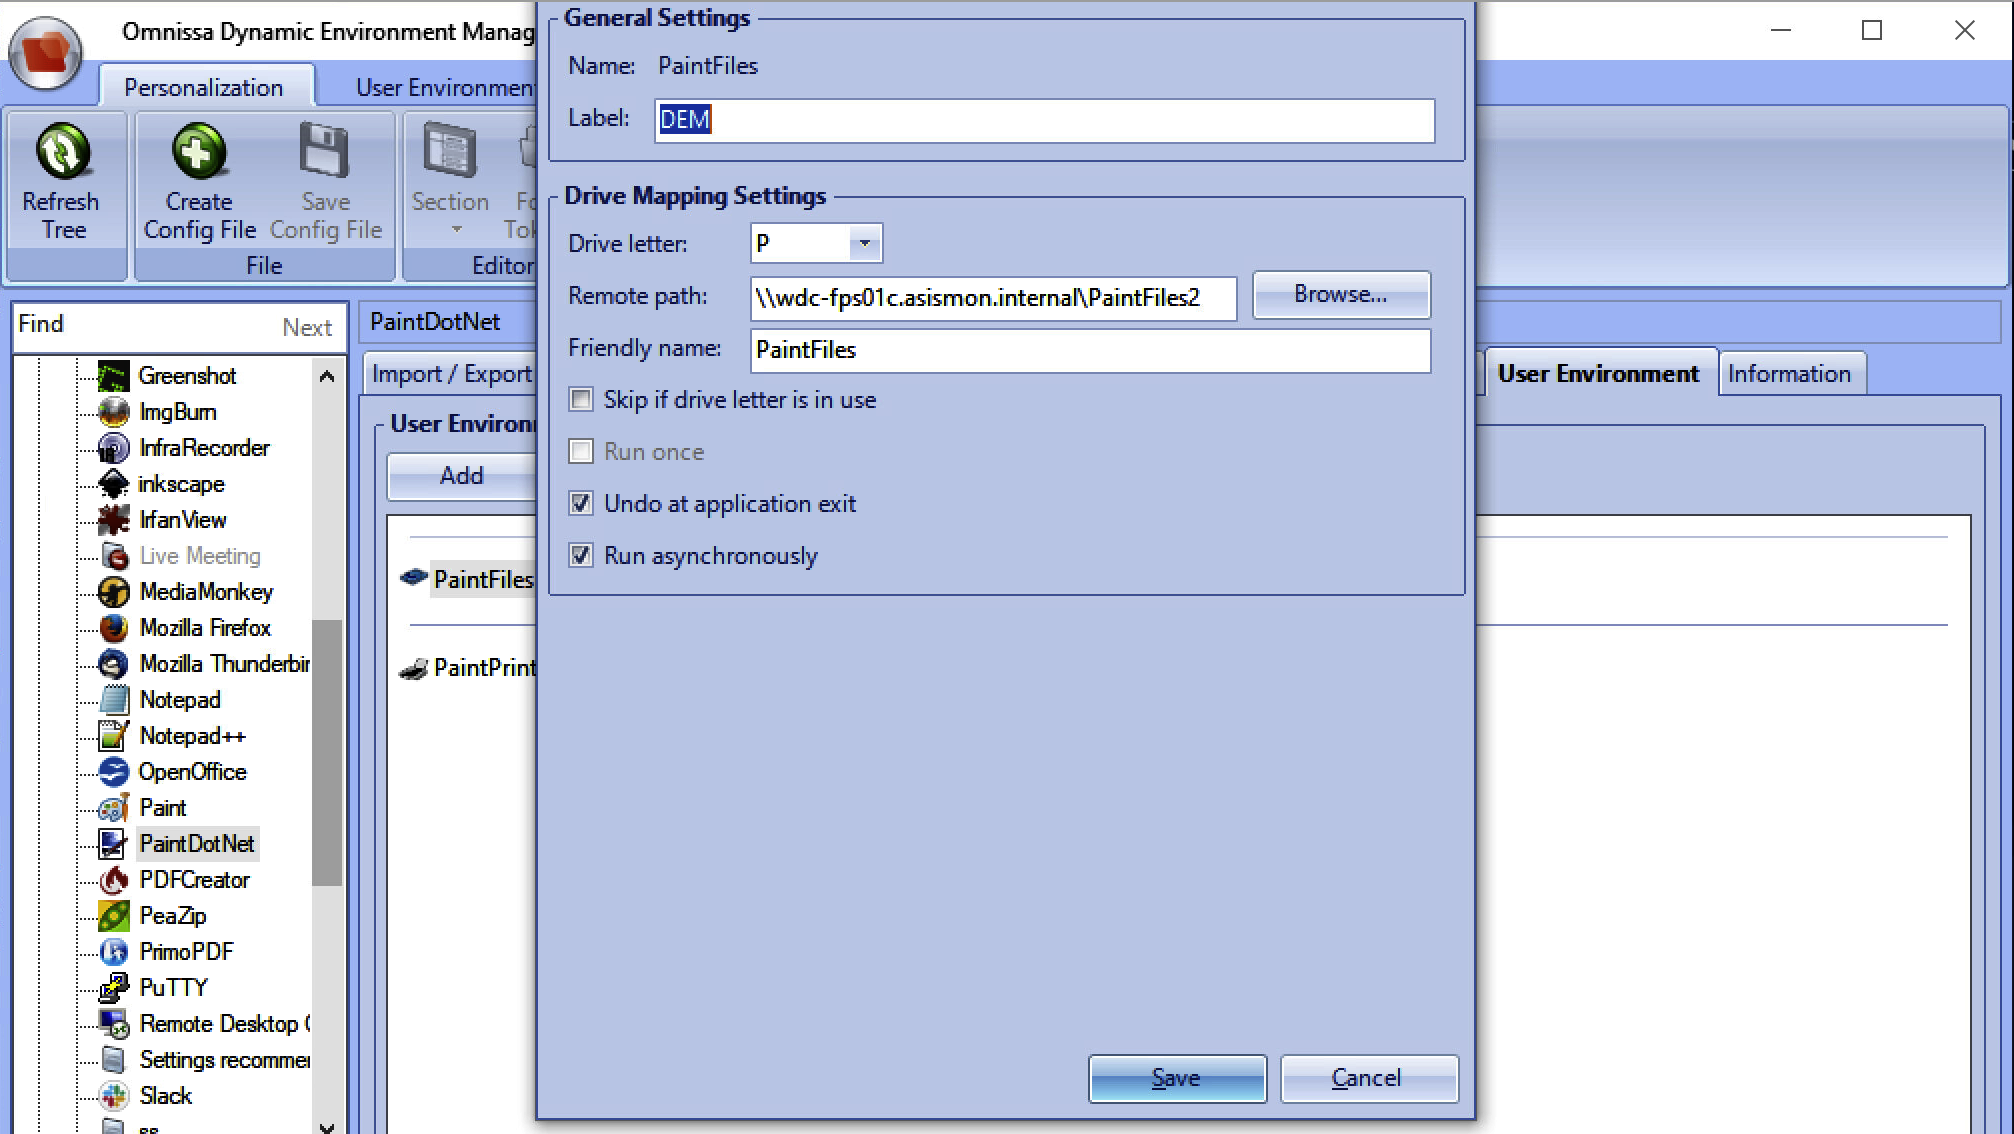
Highlight the Drive Mappings “PaintFiles” configuration by selecting edit to view. See below
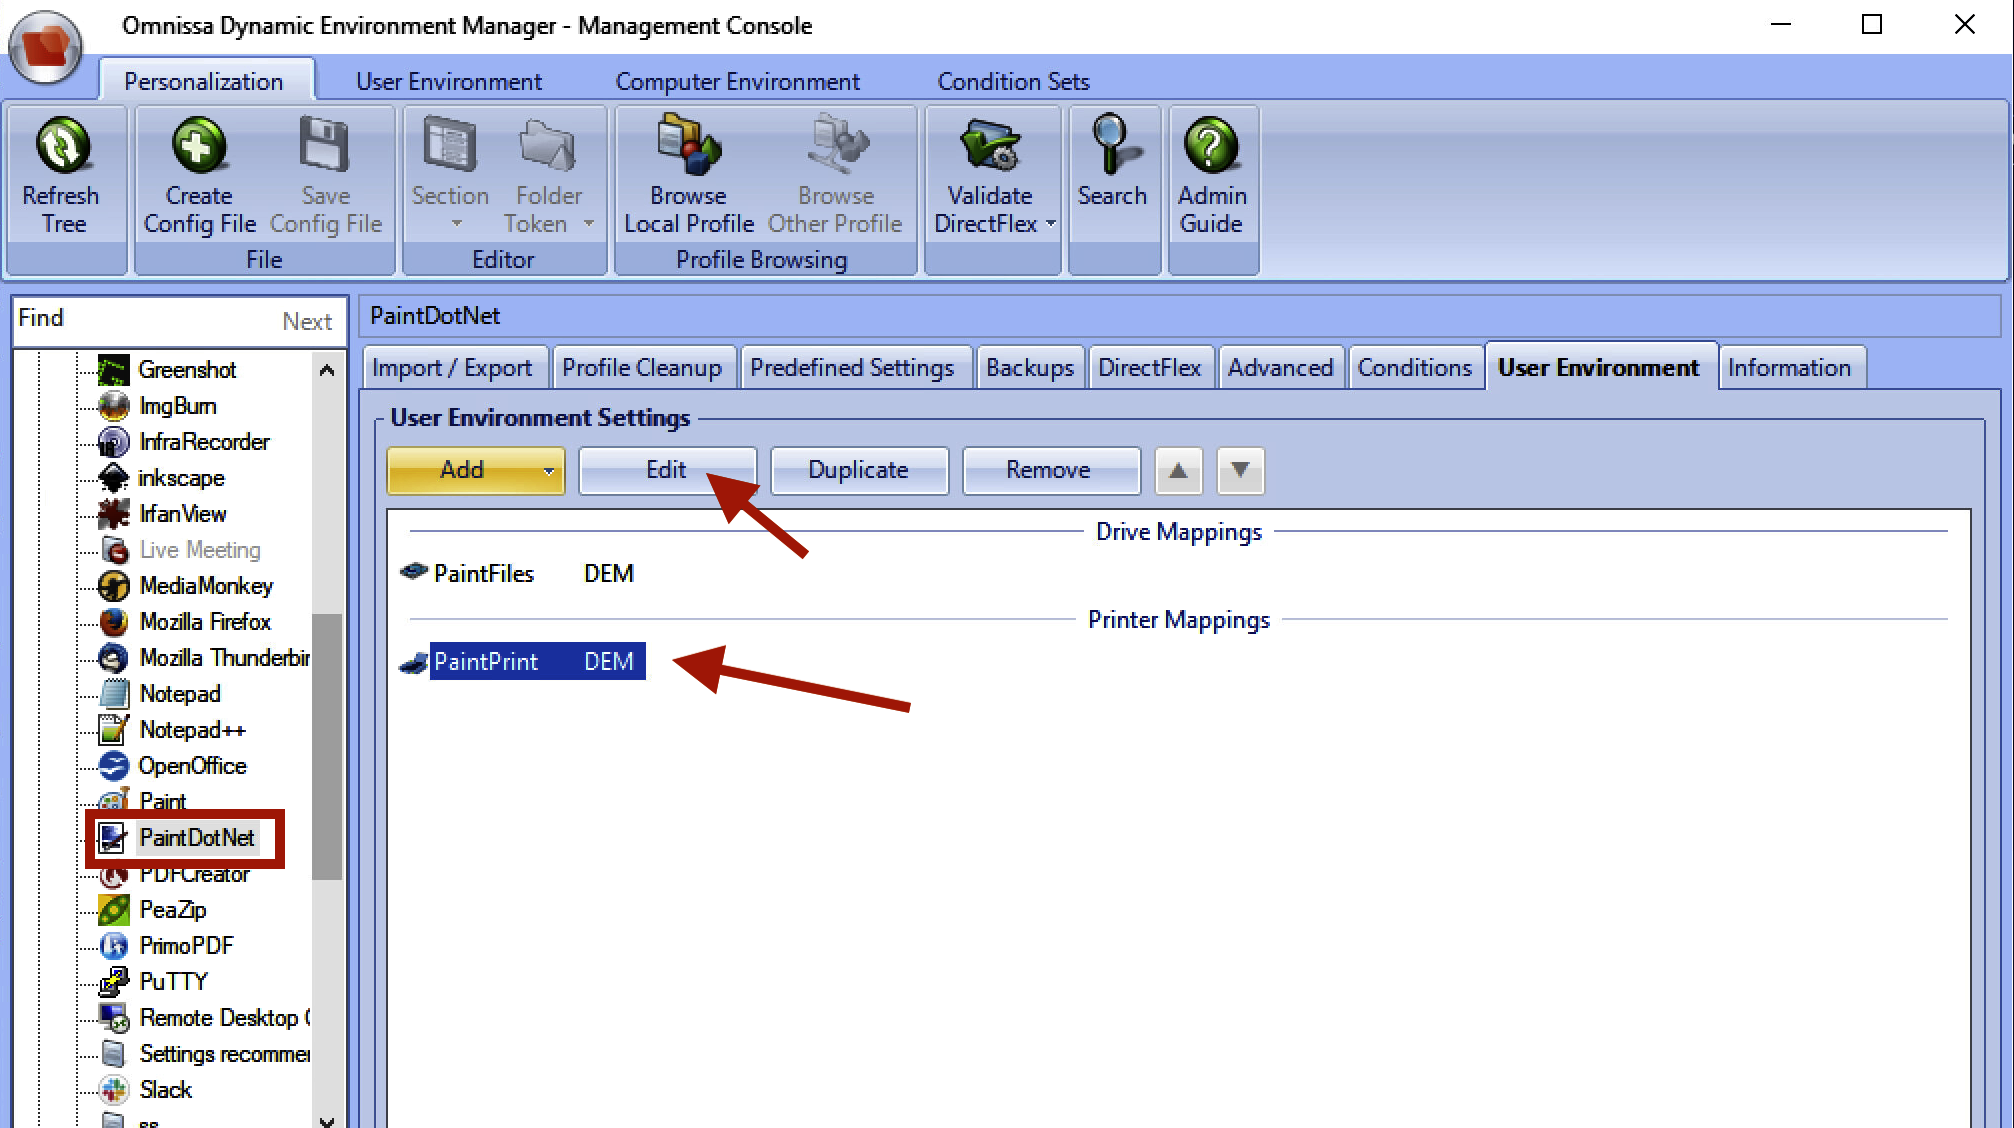
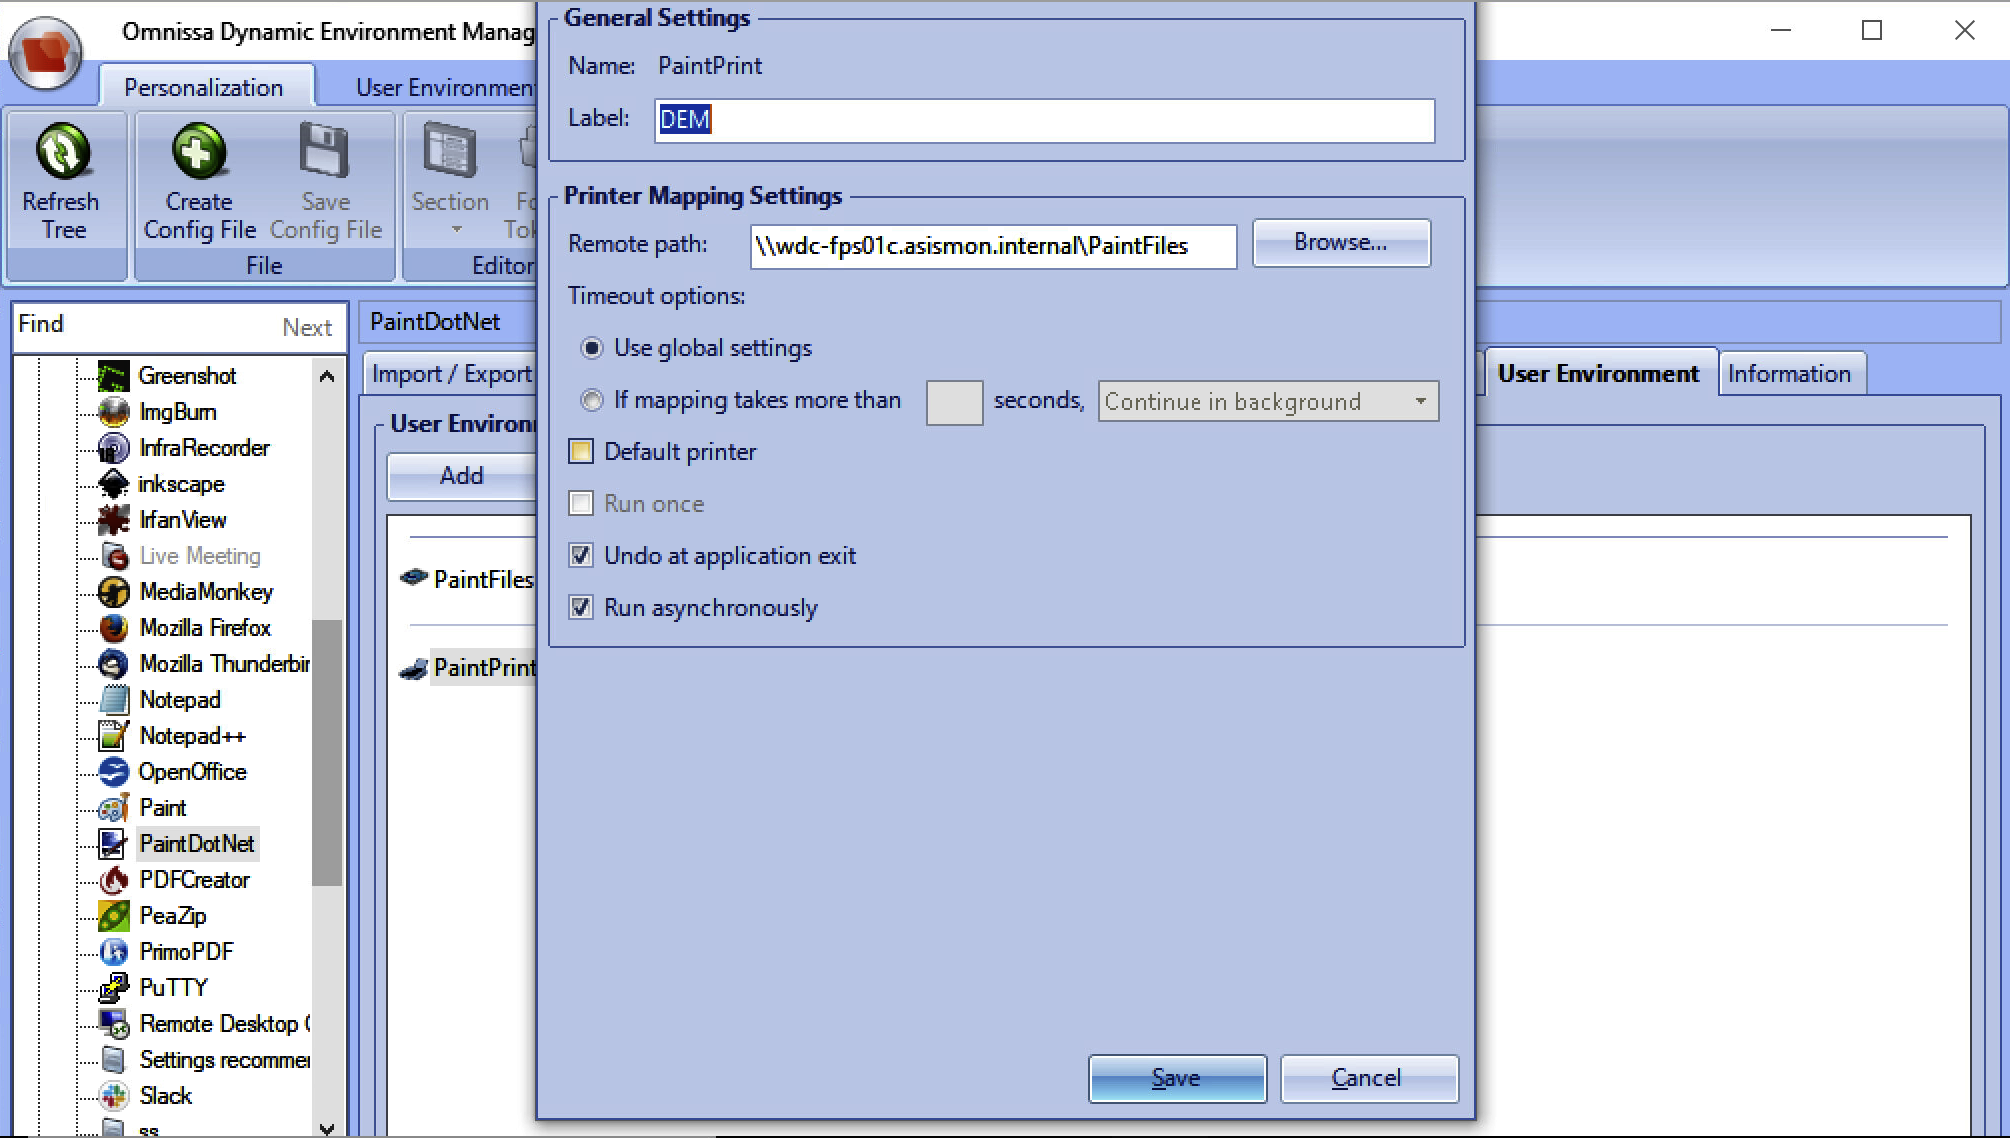
Do the same for the Printer Mappings “PaintPrint” (see below)
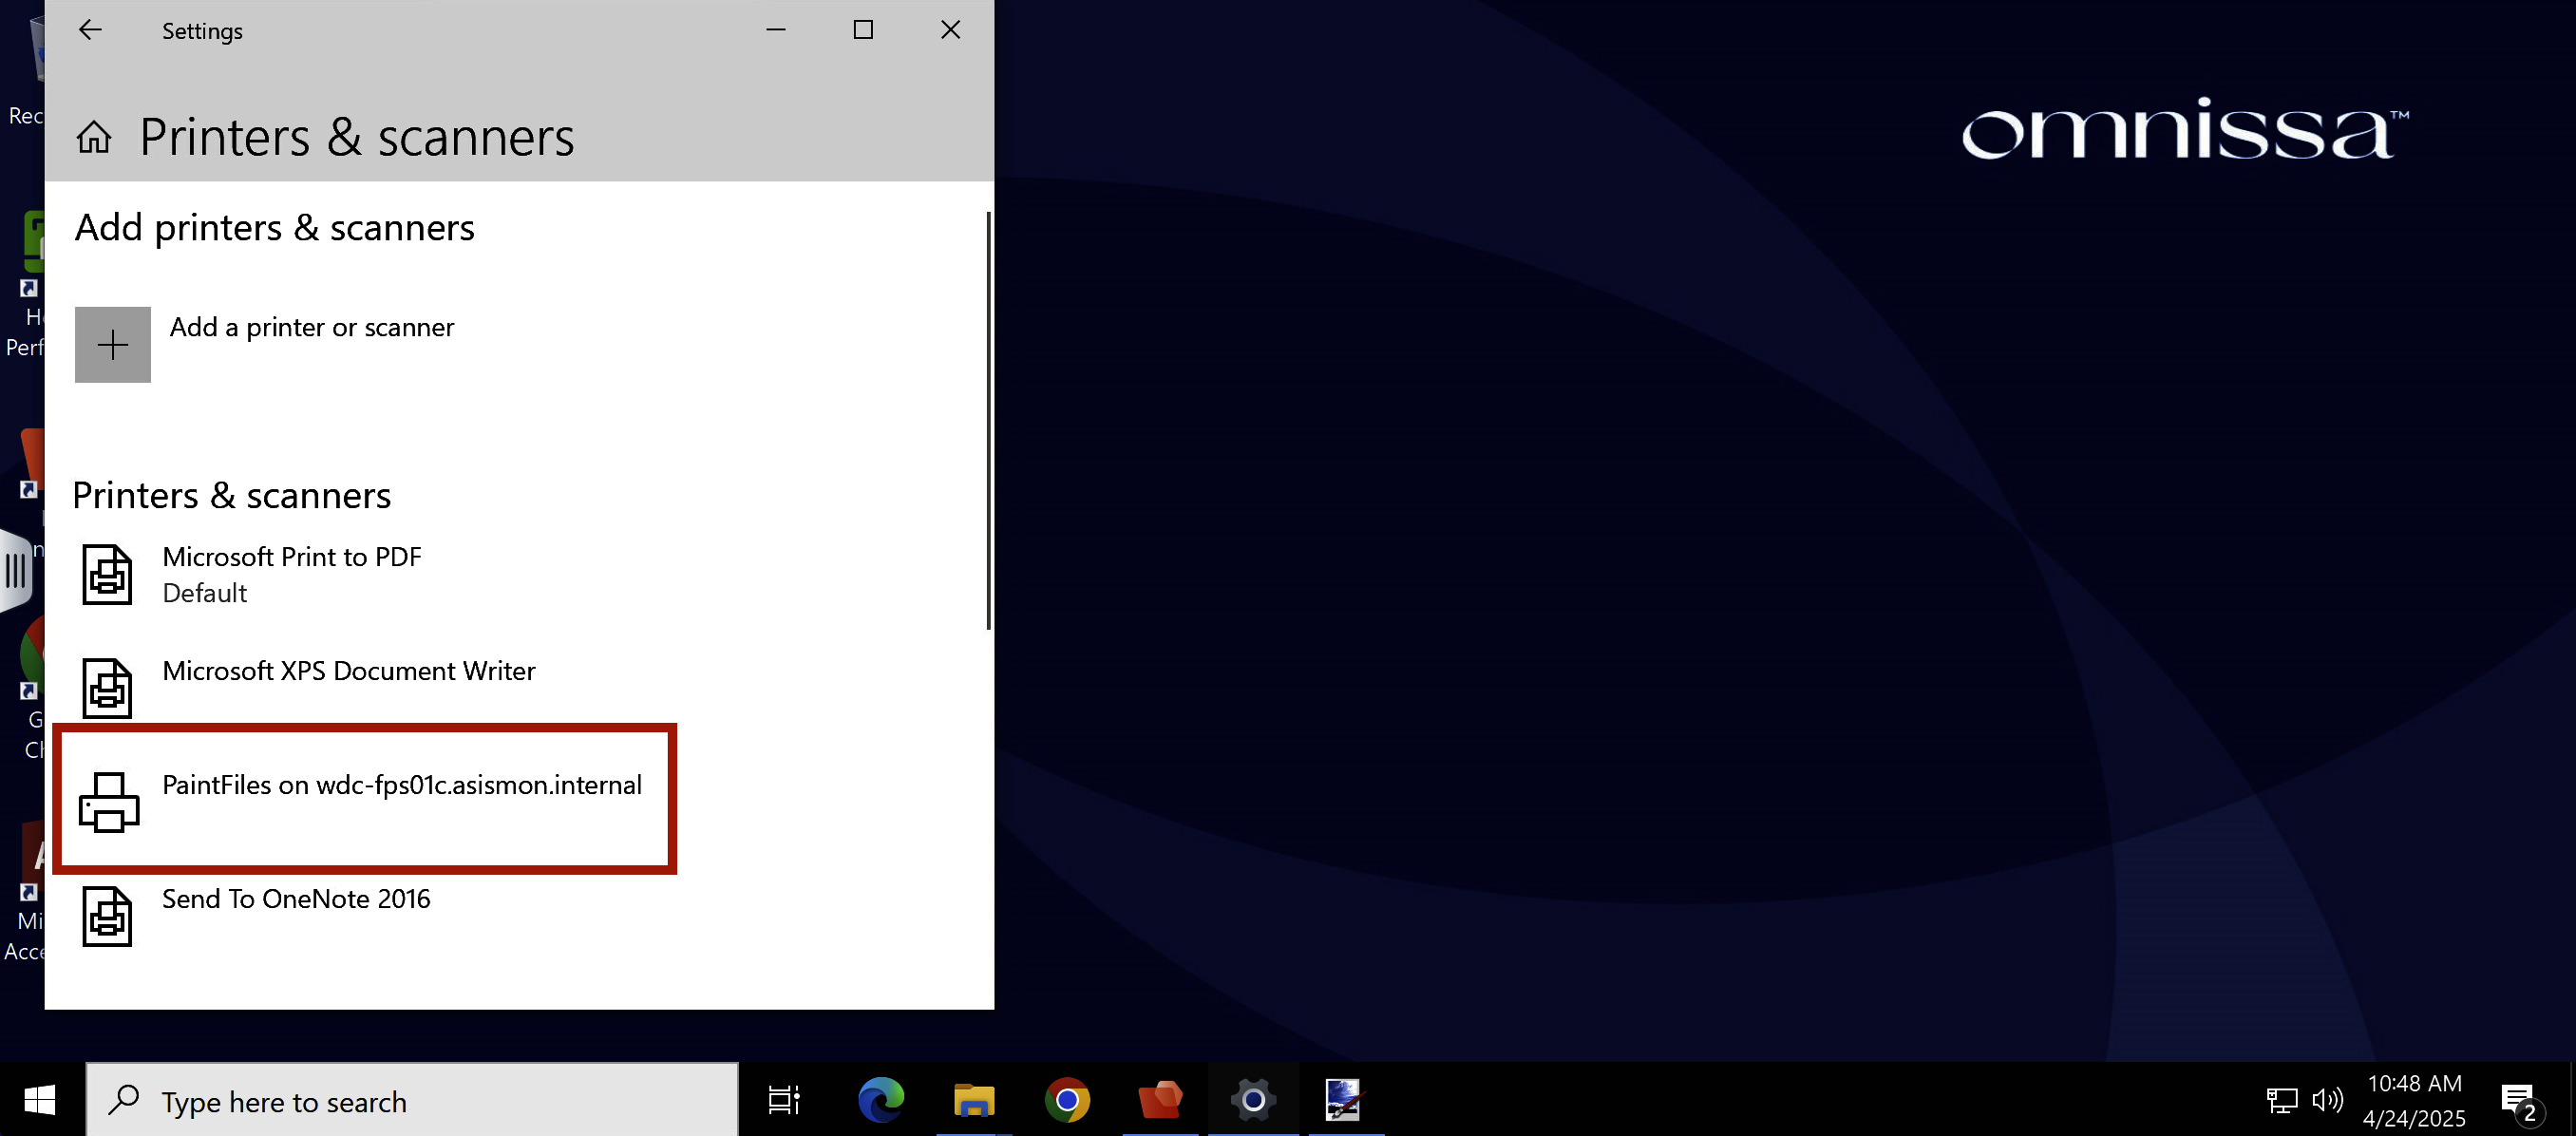
Close down the Dynamic Environment Manager console, before we launch the app let's fire up a Windows Explorer window and our Printers and Scanners so we can see the drive and printer mappings appear when we launch the "Paint.NET" app. We want to specifically call out the "This PC" and search for "Printers and Scanners" as these will change once we launch the app.

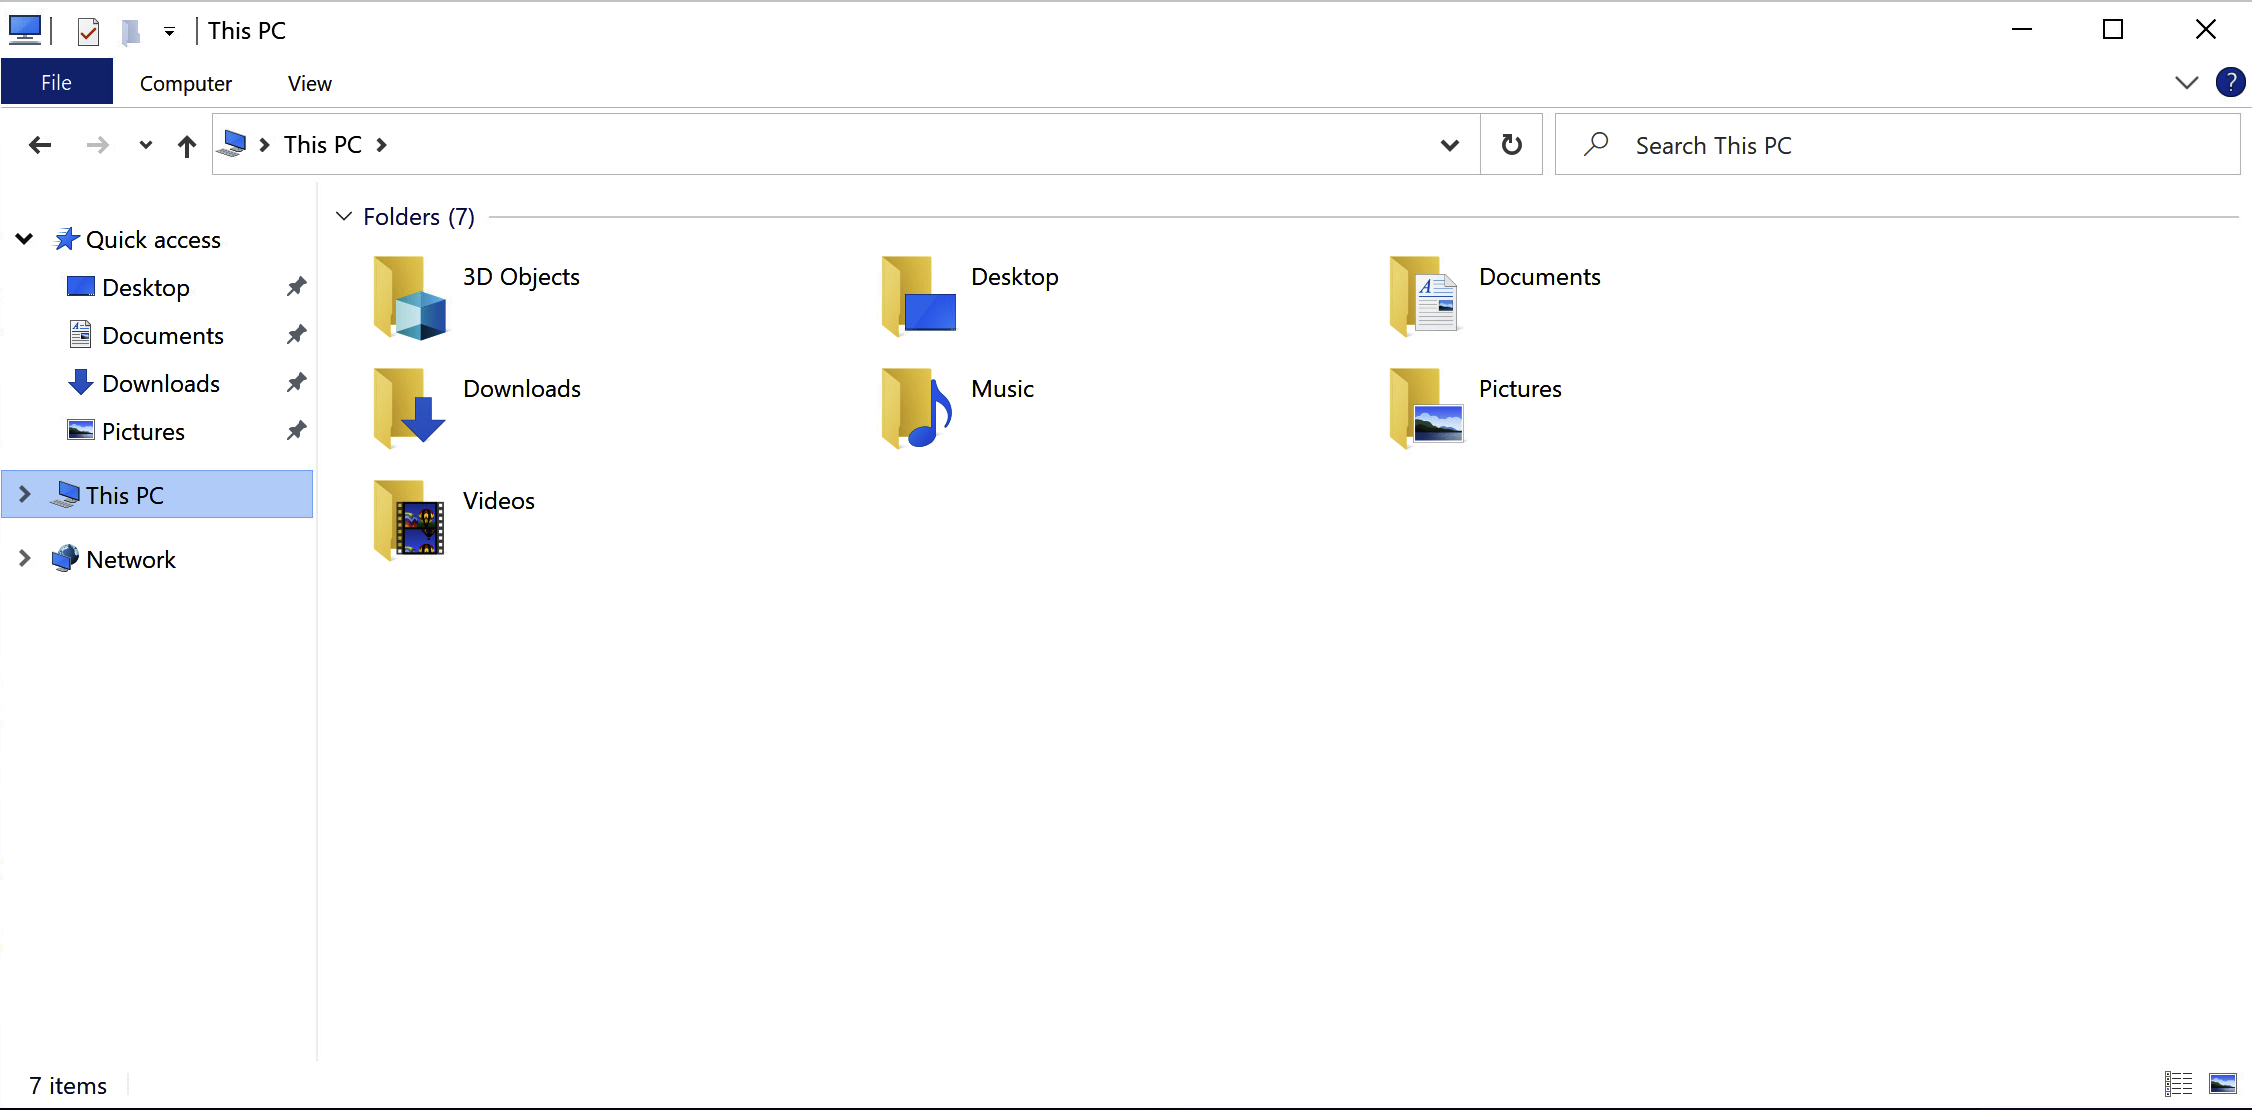
Note no drive mappings currently exist.
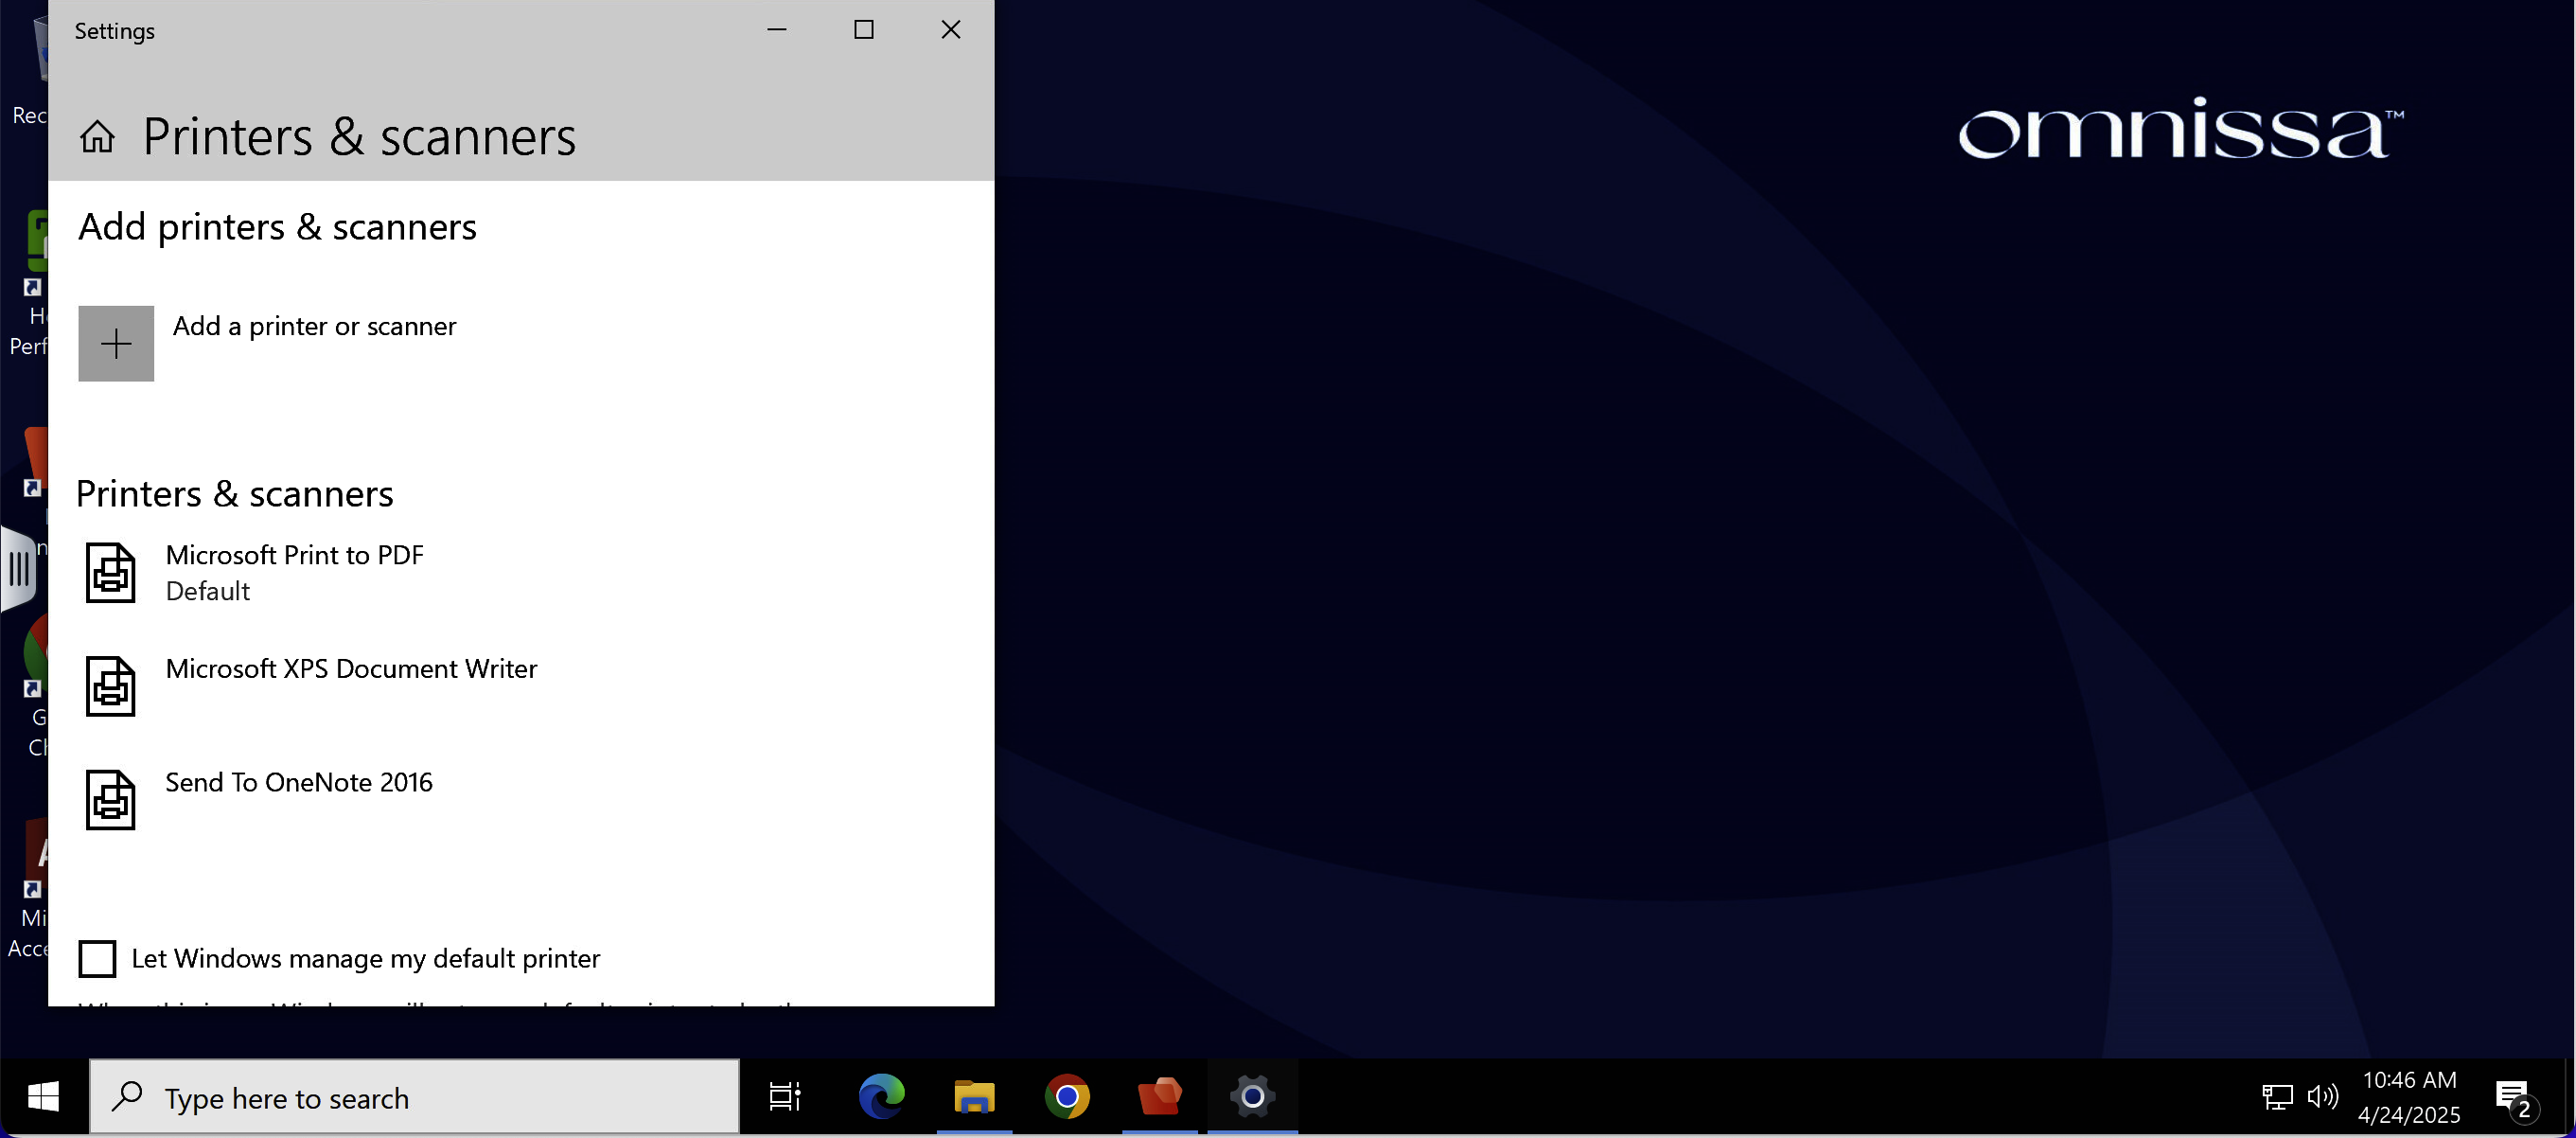
Note the default list of printers and scanners.

From the TD-RDS-Desktop, launch the Paint.NET app.
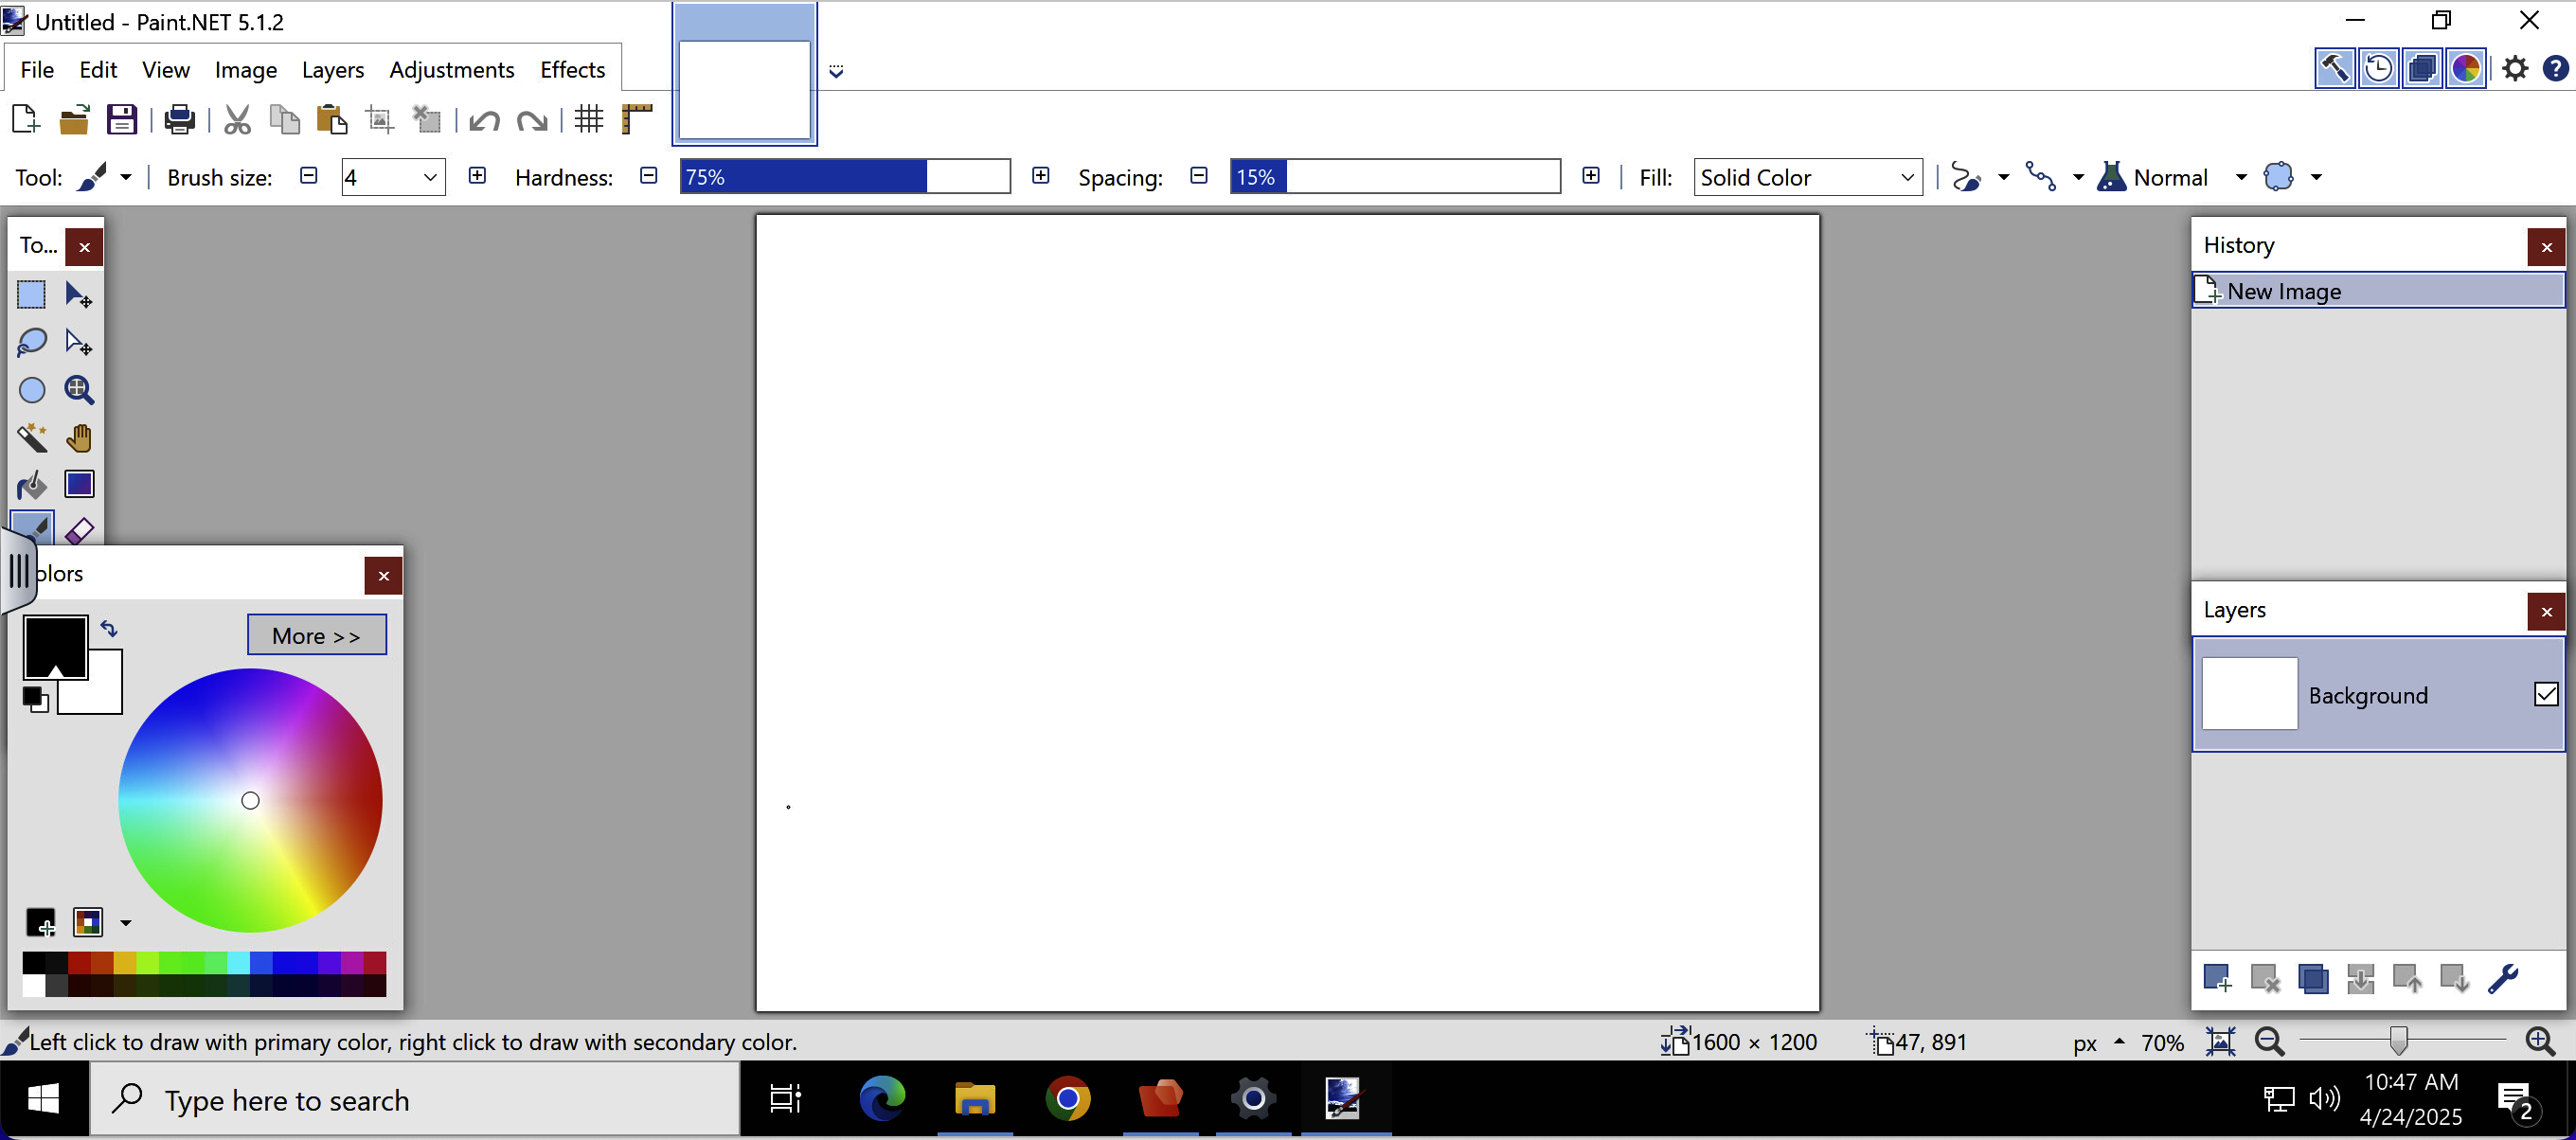
Minimize Paint.NET
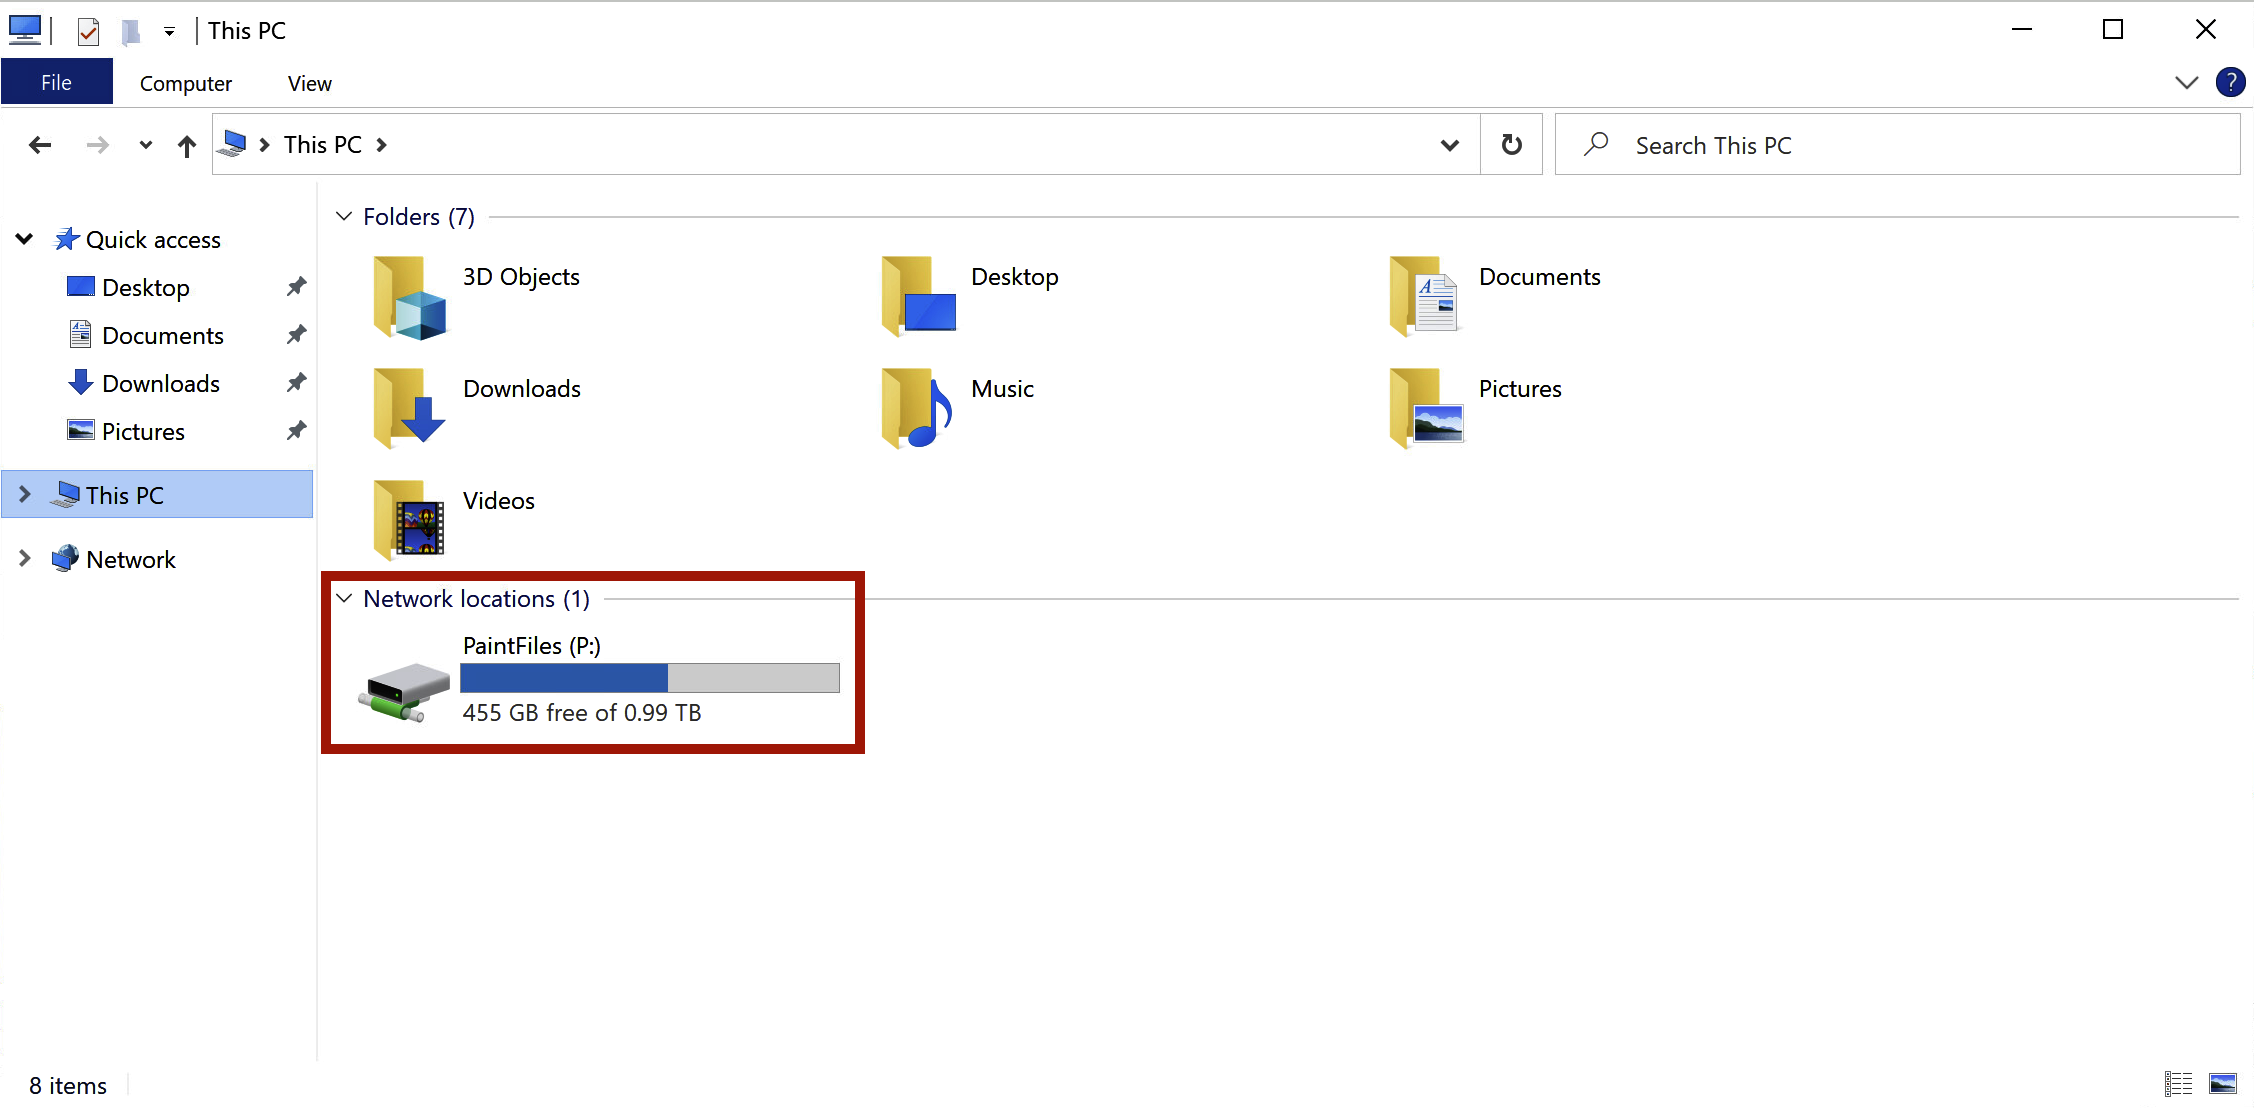
Maximize File Explorer and focus on “This PC” Note that the PaintFiles P: drive has been mapped as a result of launching the Paint.NET app.
Next maximize the “Printers and Scanners” view. We can now see the drive and printer mappings appear after we launched the "Paint.NET" app.

So let's switch back to the "Paint.NET" app and make some changes to the windows or tool palette layouts within the app.
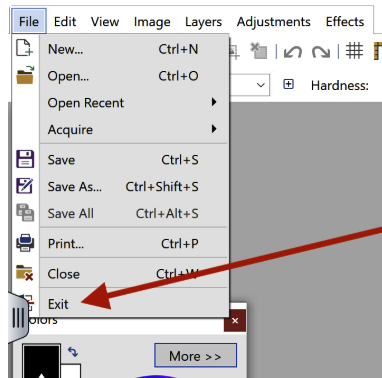
Now close the "Paint.NET" application BUT leave your RDS Desktop session running, we'll be coming back to that in a minute
So let's go back to our Workspace ONE bookmarks and now we can launch the "RDS-Paint.NET" published application. Click Allow if you get prompted. Notice that you now get the same window layout you configured in the RDS desktop session. This has occurred because DEM has saved and persisted your app configuration settings
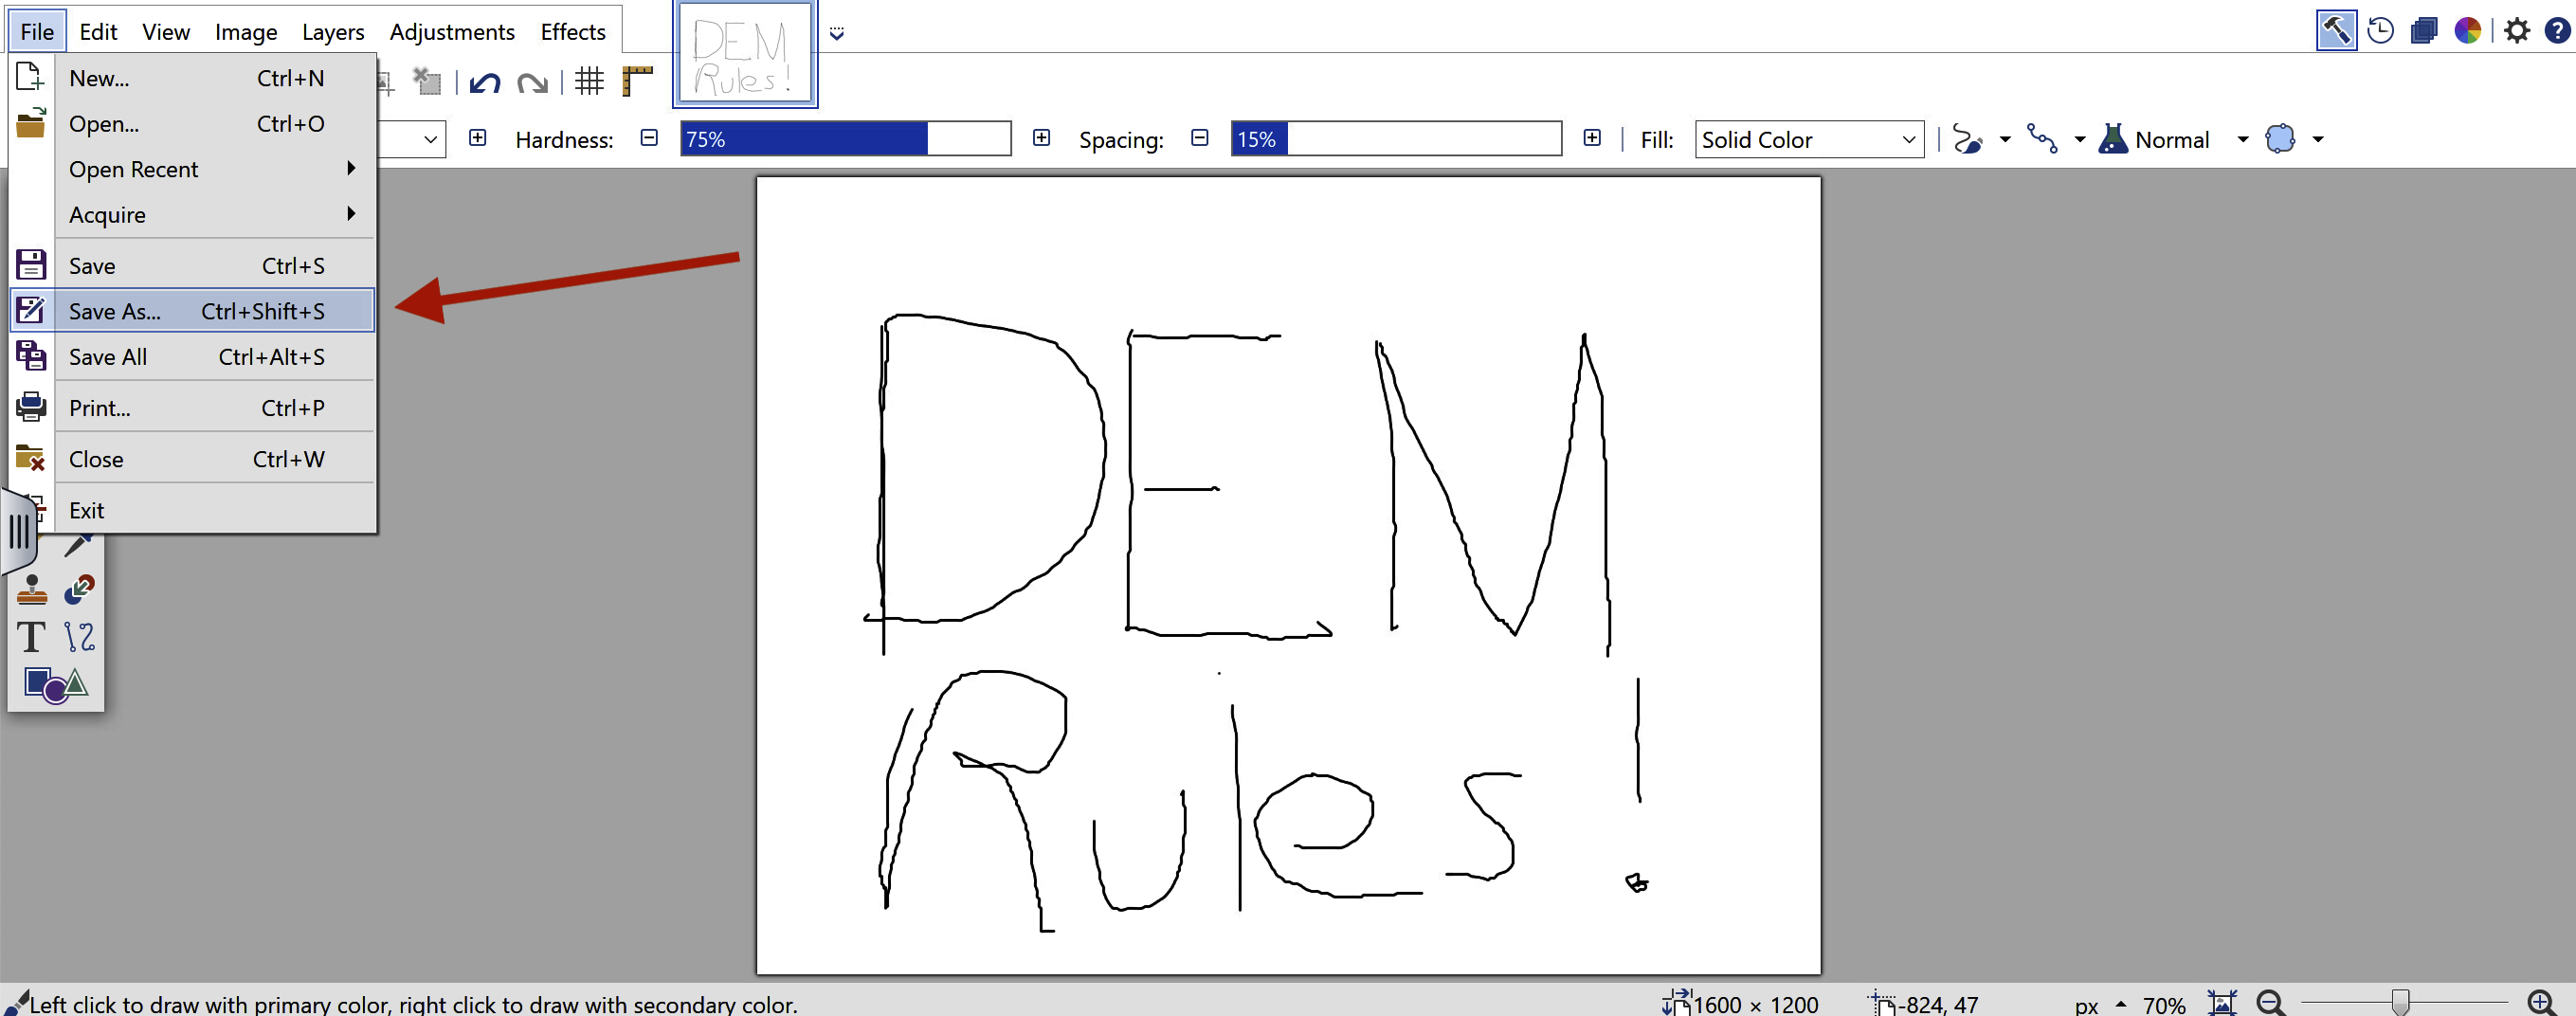
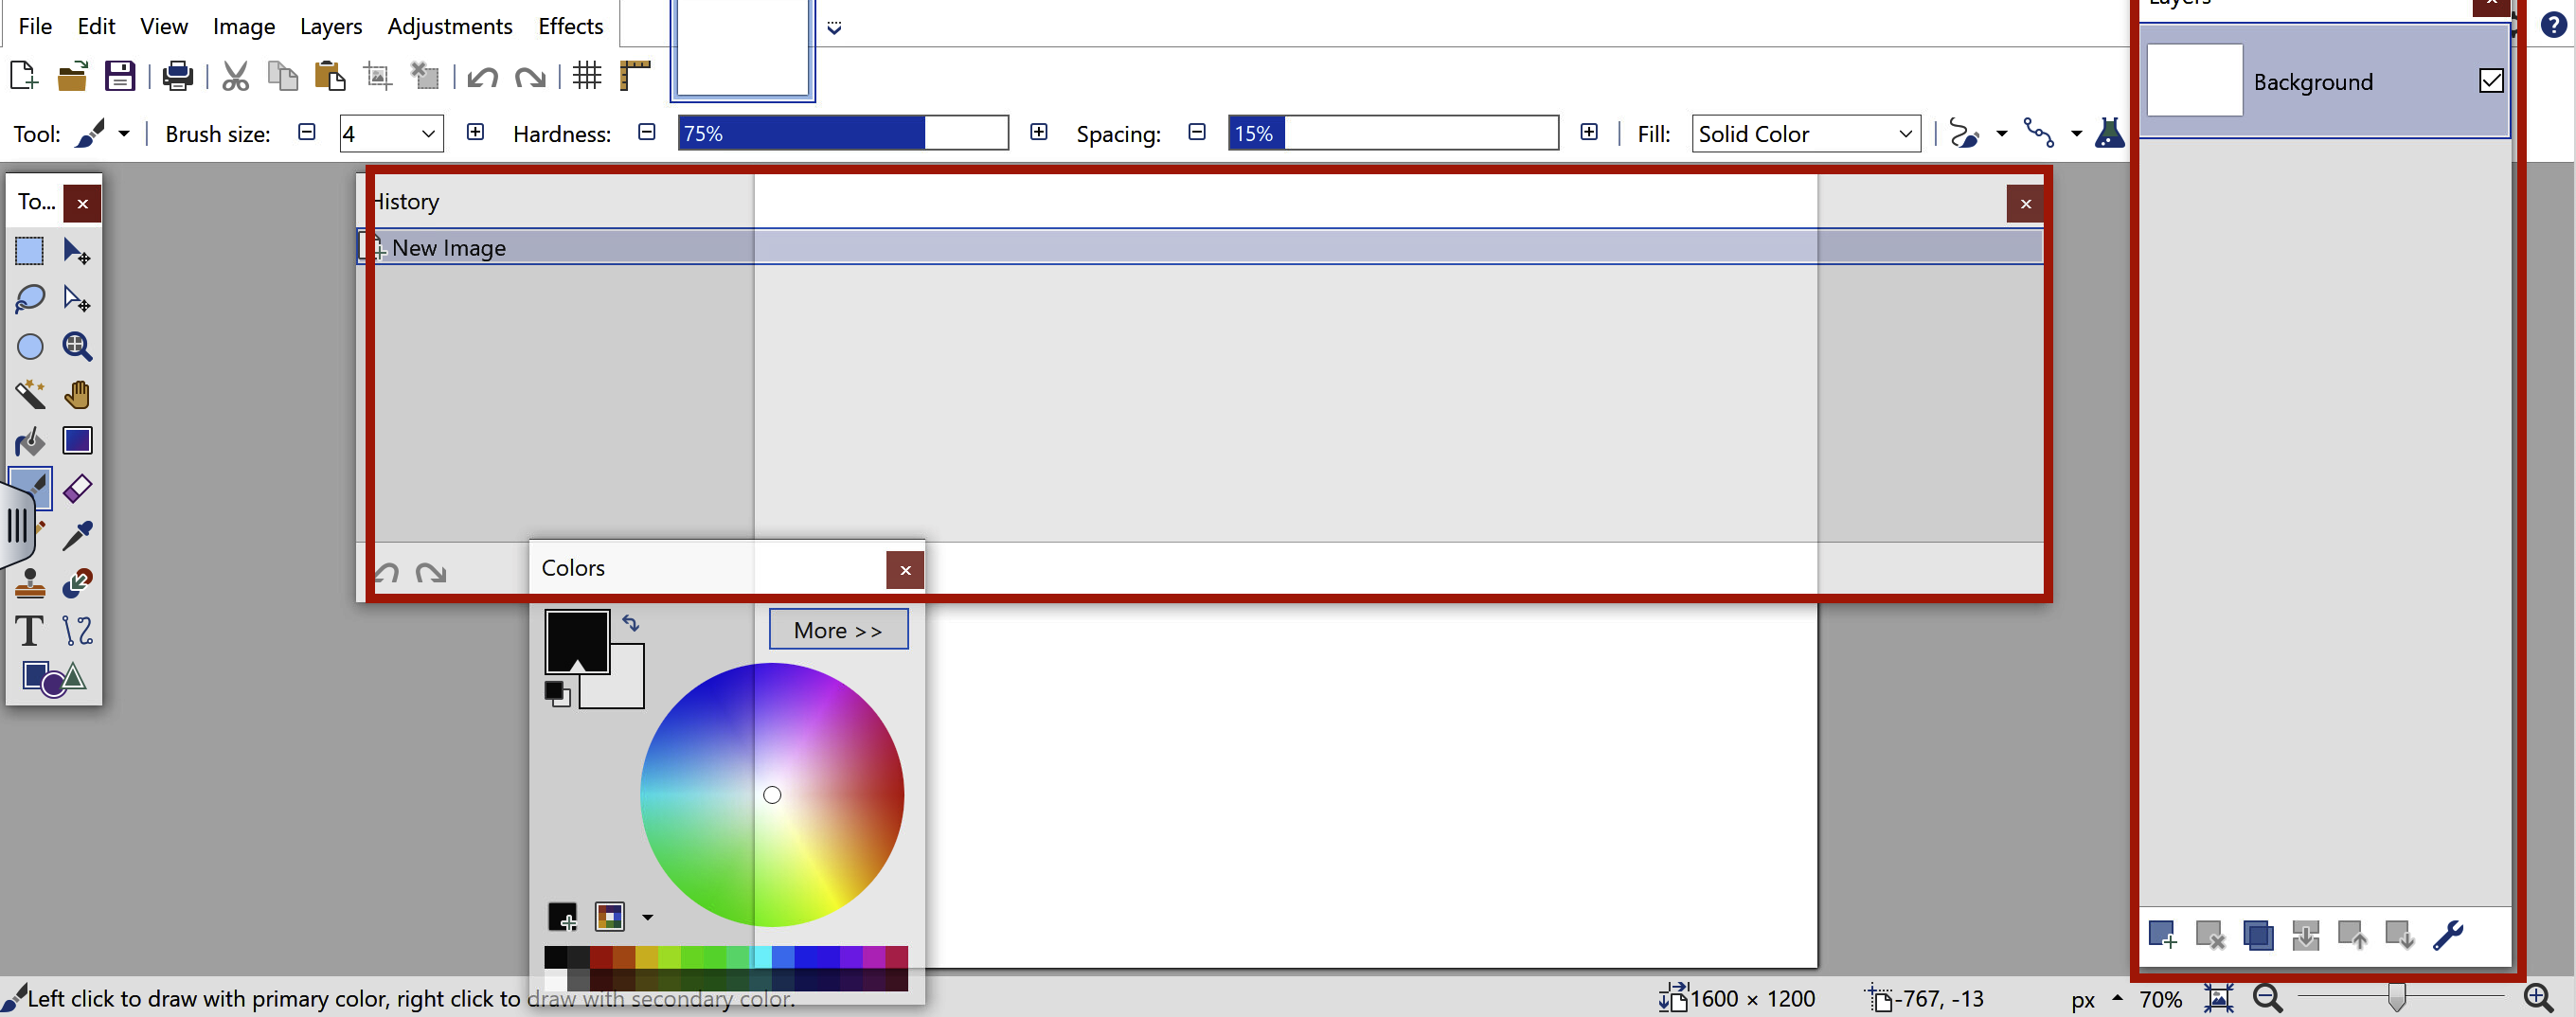
Now let's make some more changes to the application, in this case draw something on canvas.
Then save it to the PaintFiles P drive.
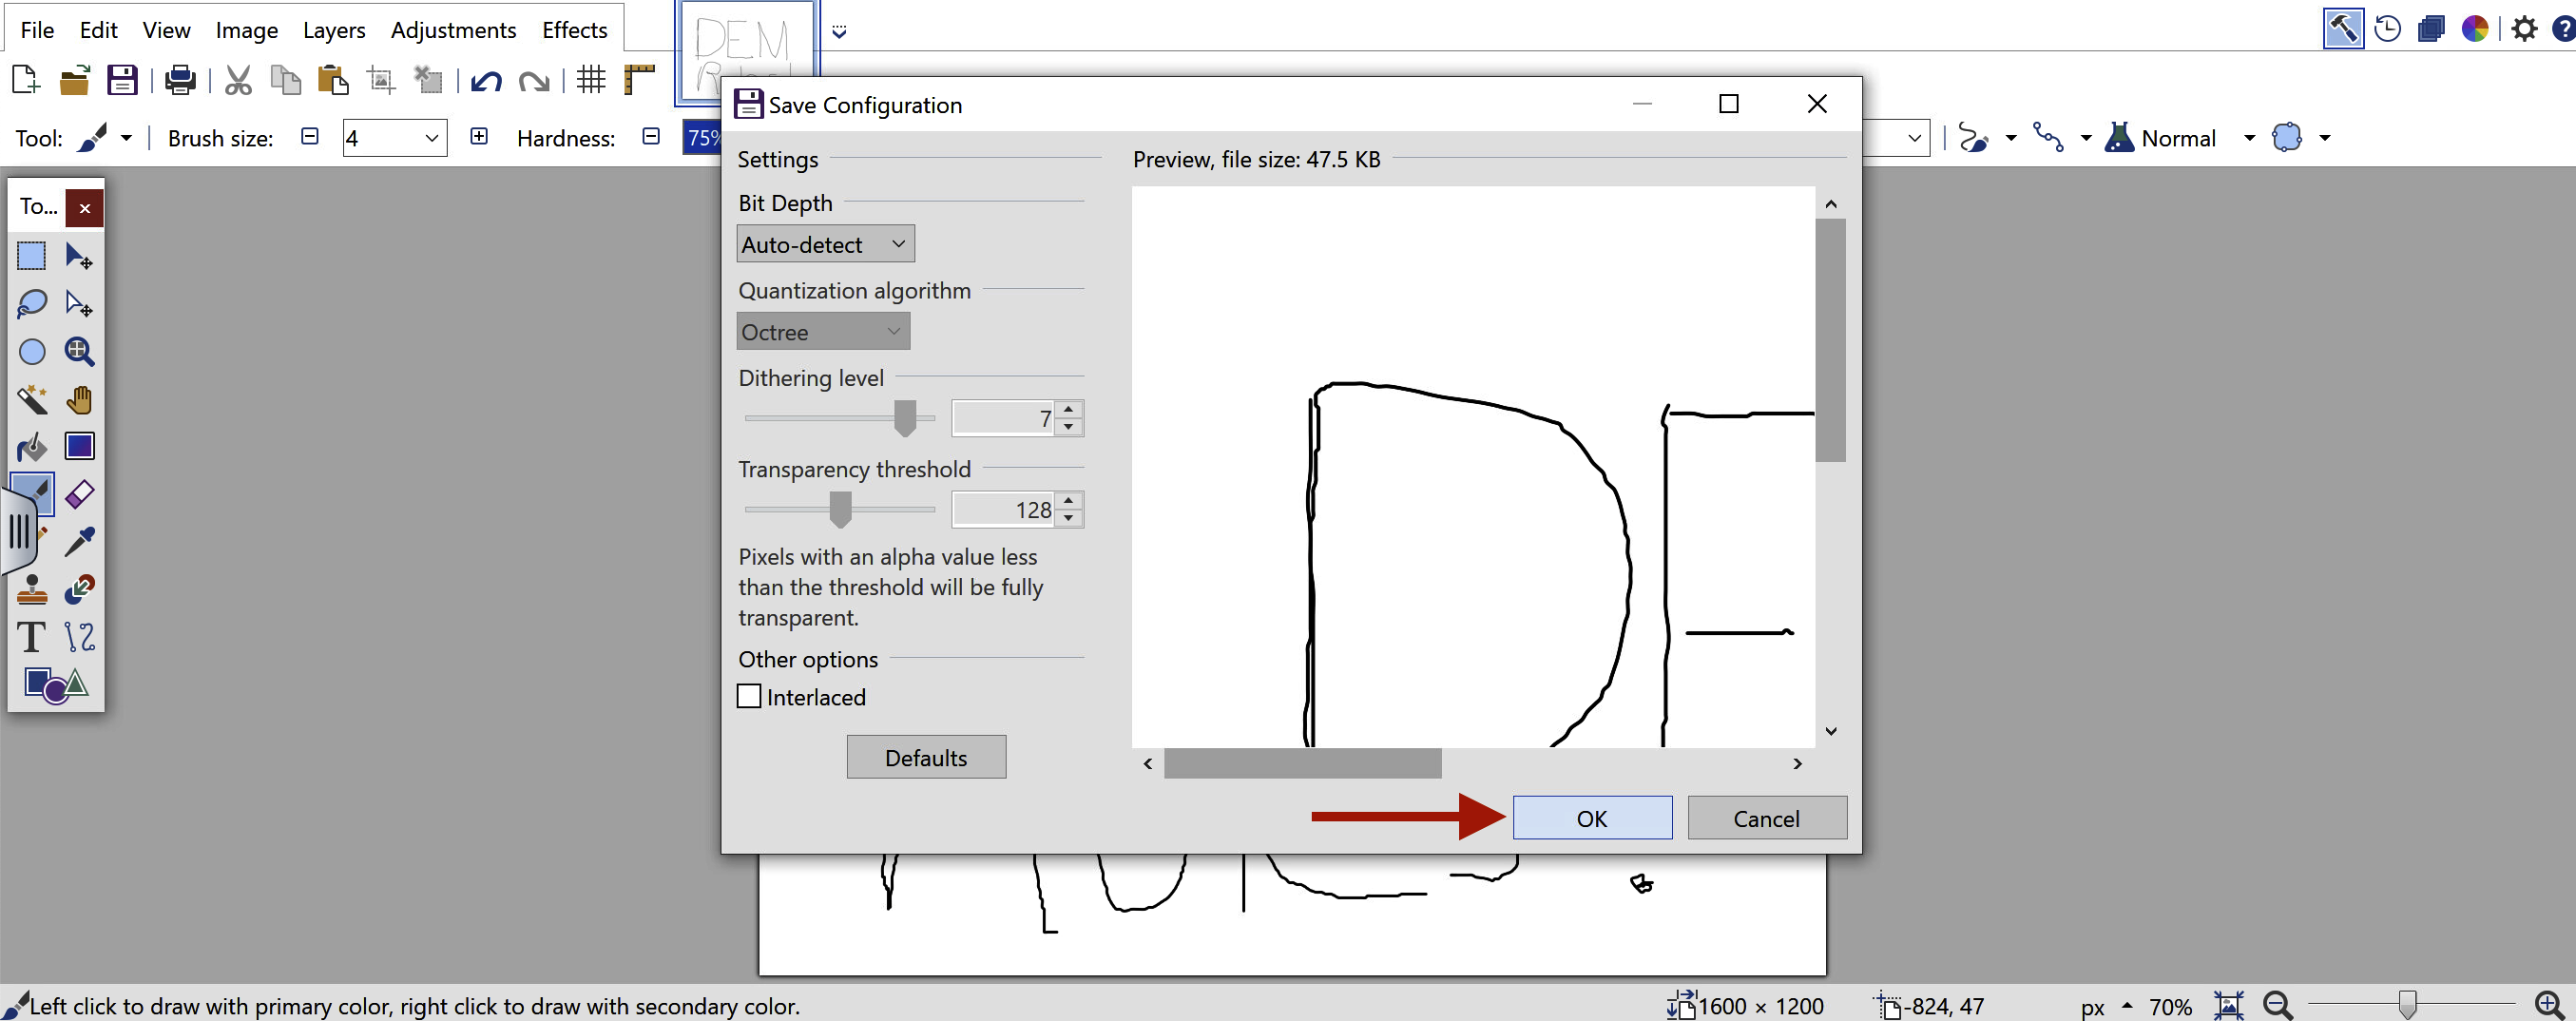
Click OK to complete the save.
Close out of the published application and go back to your (hopefully!) still running TD-RDS-Desktop session, and launch "Paint.NET"
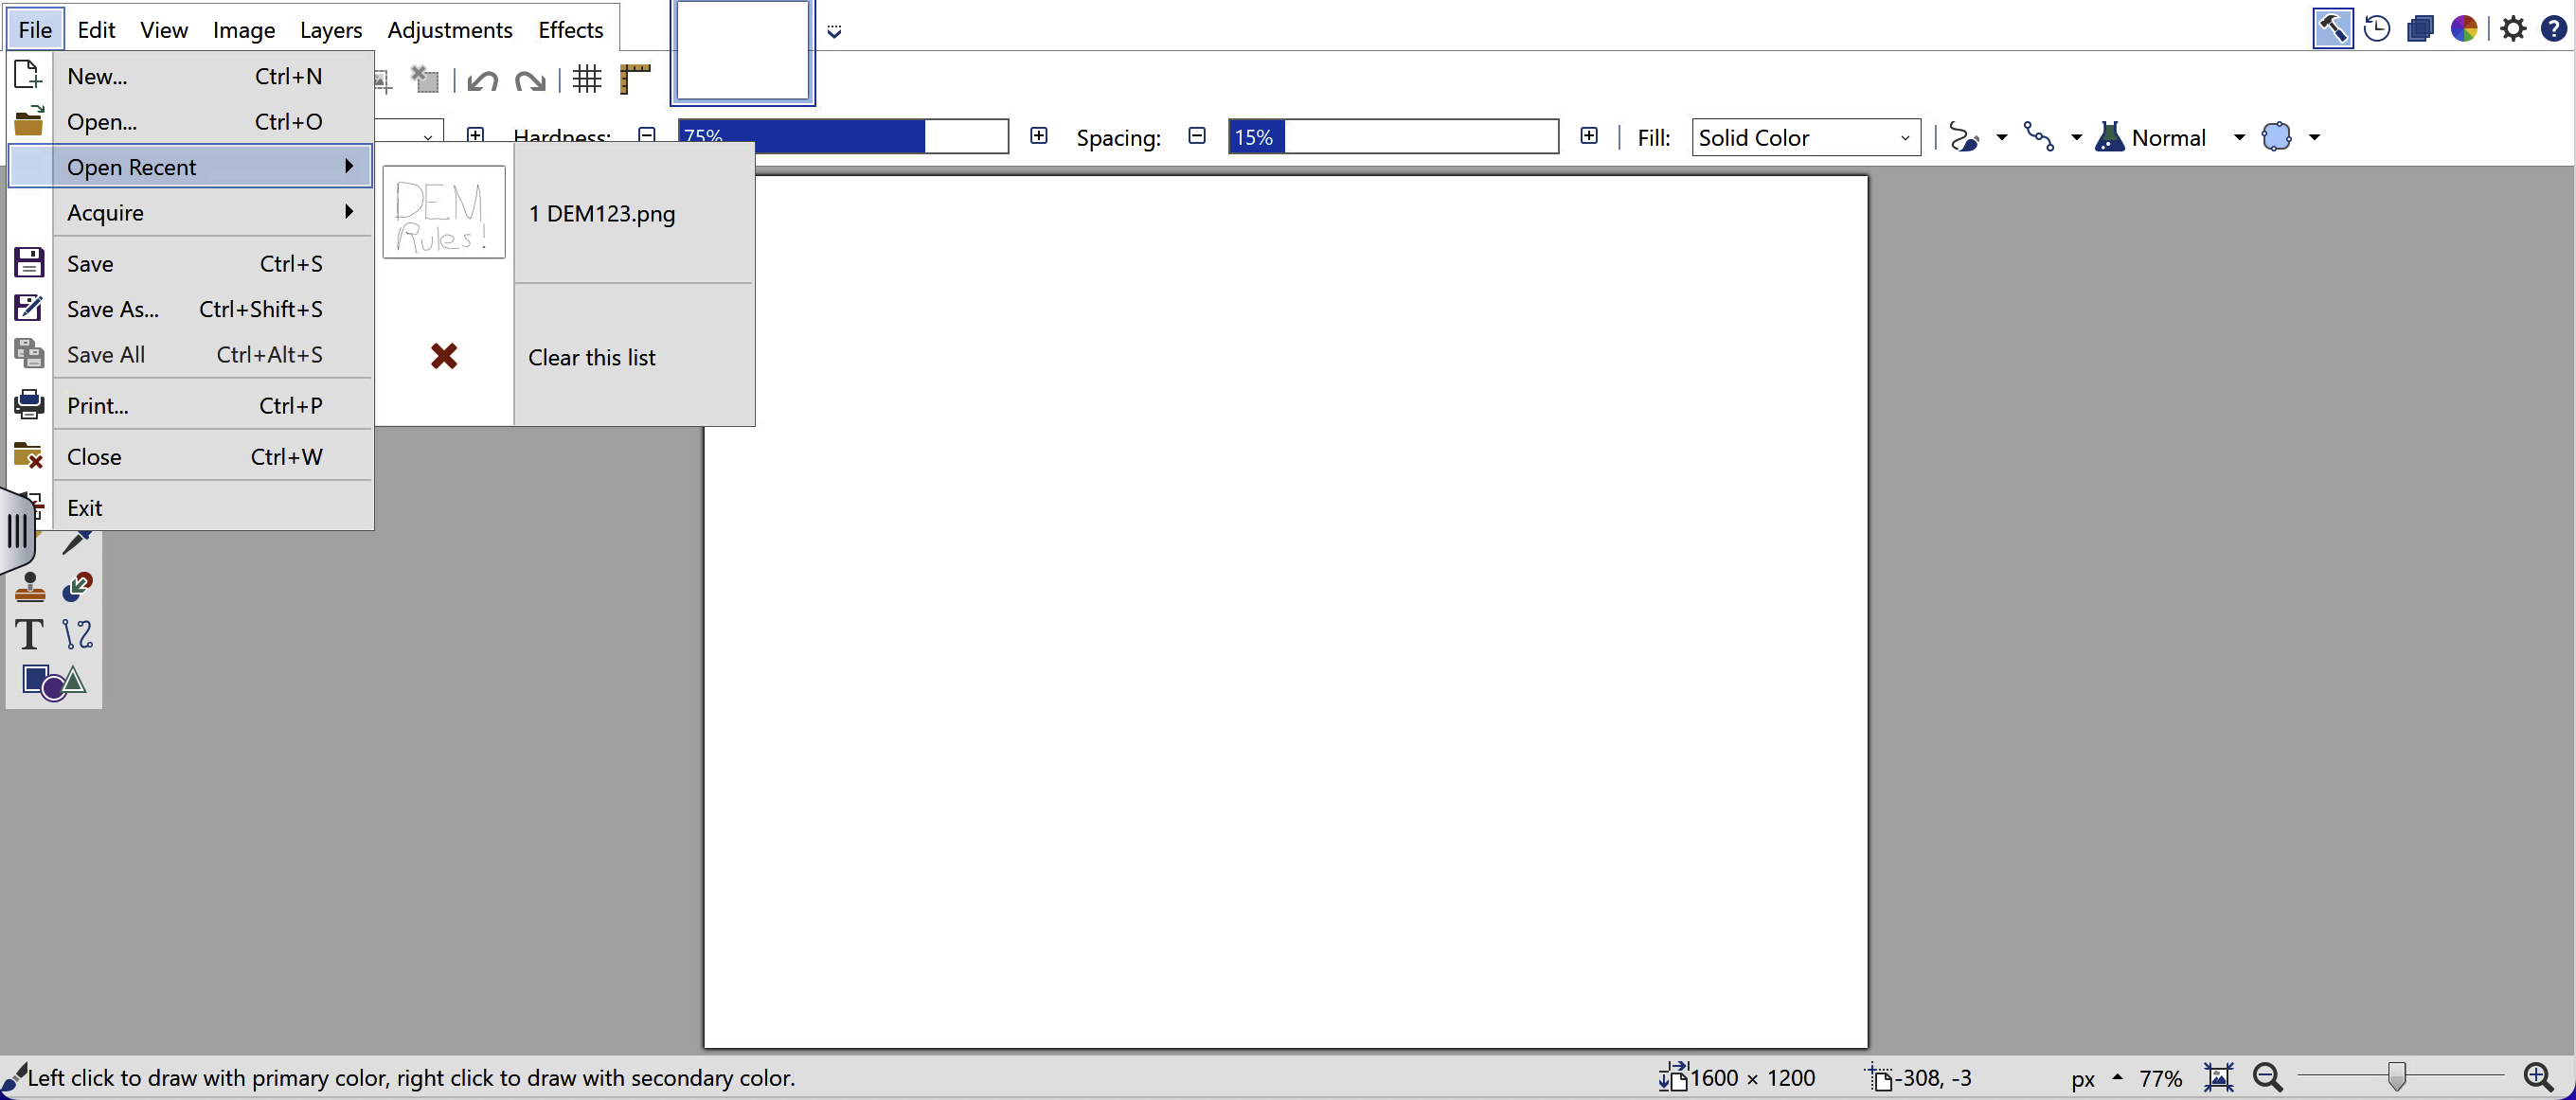
Go to the “Open Recent” and note the recently saved document persists.
Go ahead and select it.
That is the last step in this super simple DEM demo! That's a logical place to stop, let's have a quick recap of what happened!
Walkthrough Summary
- We added the Horizon RDS Desktop and "Paint.net" published application to our Workspace ONE bookmarks
- We made a connection to the RDS Desktop and launch the DEM Console to show a managed application configuration for "Paint.net"
- We noted the application specific network drive and printer mappings associated with "Paint.net"
- From the RDS Desktop we launched the Paint.net application and demonstrated the drive and printer mappings in effect, then changed some app settings before closing the app
- We then launched the "Paint.net" Horizon published application from Workspace ONE and showed the application specific settings we changed had been saved and persisted across sessions